Do you have honey Oak cabinets in your home that need updating? If you dislike the look of your outdated cabinets, there’s good news! Painting your oak kitchen cabinets is a great way to get the update you’re craving without the enormous cost of buying new cabinets.
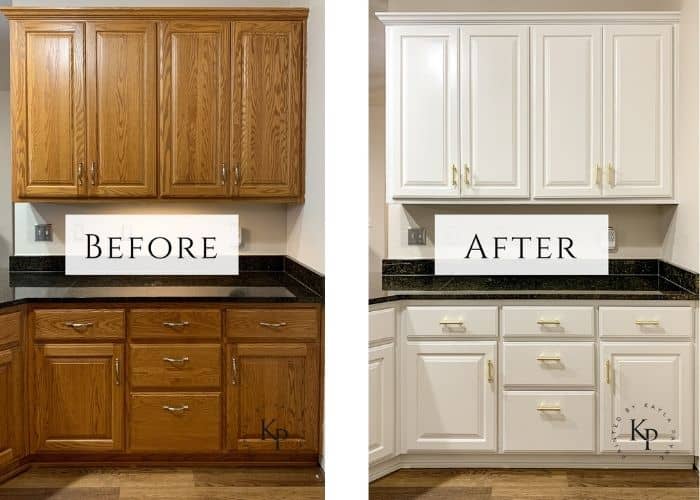
While cabinet painting is a great DIY project, painting oak cabinets the right way is so important. Not only do you want a professional-looking, smooth finish, but you also need your paint finish to stand the test of time without peeling, chipping or cracking.
My goal with this blog post is to provide you with the most comprehensive and professional guide on exactly how to paint oak cabinets without compromising shortcuts.
I’ve been painting kitchen cabinets professionally for the past decade. After painting oak cabinets in hundreds of homes, I’ve distilled everything you need to know in order to achieve a high-quality paint finish.
Rest assured, the step-by-step tutorial in this article is written by an actual professional cabinet painter, not by a homeowner who decided to paint their cabinets one weekend and then chose to write about their singular experience – a significant distinction.
Download a free cabinet painting supply list
Before we begin with the tutorial, feel free to grab The Ultimate Cabinet Paint Supply List! I’ll email it directly to your inbox – that way you’ll have it quickly for future reference.
It contains everything you need to paint your cabinets like a pro.
Okay, let’s get started!
Exactly How To Paint Oak Cabinets
Table of contents: Click on any step to jump to that section.
- Step 1: Take before photos
- Step 2: Label and disassemble
- Step 3: Clean
- Step 4: Sand with 120
- Step 5: Vacuum
- Step 6: Tape and mask
- Step 7: Apply 1st coat of primer
- Step 8: Fill imperfections
- Step 9: Sand with 220
- Step 10: Prime 2nd time
- Step 11: Sand with 320
- Step 12: Step 9: Caulk
- Step 13: Apply 1st paint coat
- Step 14: Sand w/400 if needed
- Step 15: Apply 2nd paint coat
- Step 16: Reassemble
- Before & After Photos
Step 1: Take before photos
You’ll want a few snapshots to look back on because the before and after will be shocking!
Make sure you clean the lens of your phone camera, hold it straight and about chest high, and then snap away.
Your friends and family will be eager to see your painted cabinets before and after transformation!
Step 2: Label and remove doors/drawers
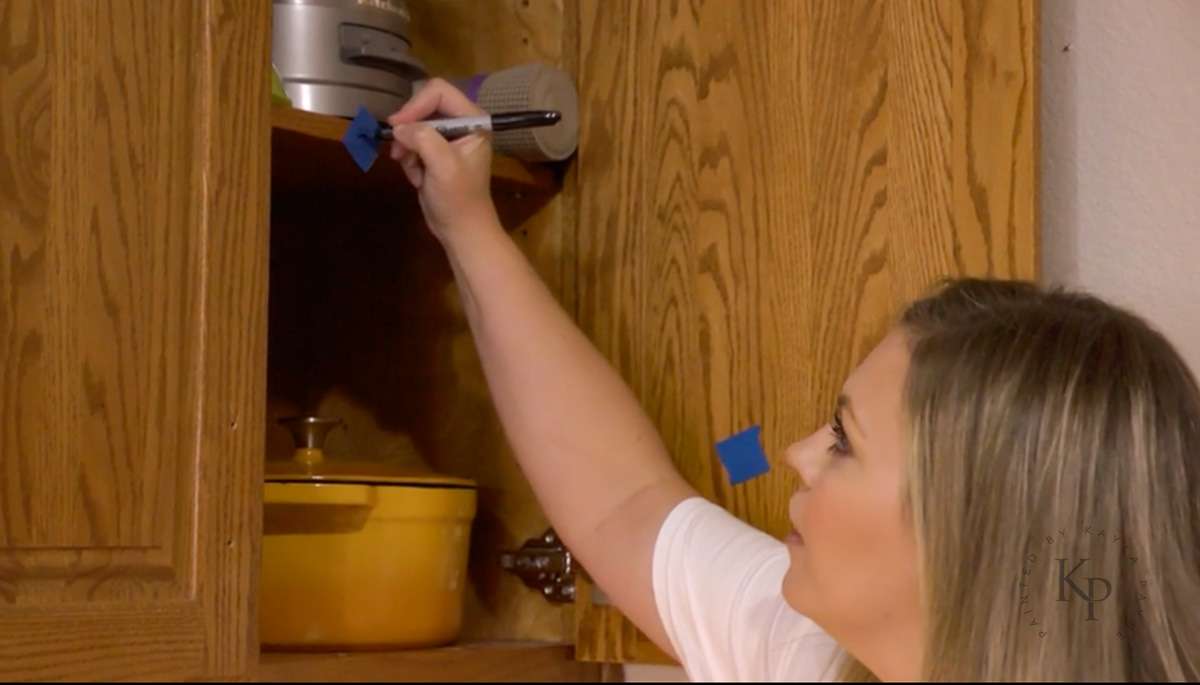
Before you begin removing hinges, don’t forget to label everything!
All you need are painter’s tape, a Sharpie marker, and a simple numbering system. Stick a piece of tape on the back of the door and a piece on the inside of the cabinet box, both with the number “1” written on it.
There is no need to get fancy with labels like “upper door to the right of the stove.” Keep it simple with numbers. Go around the room and number each door/drawer you remove.
Keep track of where the hinges go too. Each hinge needs to be put back exactly where it came from.
(Jump back up to table of contents)
Step 3: Clean cabinet doors, drawers and face frames
I’ve been asked many times, “Why do I need to clean first if I’m going to be sanding? Won’t sanding essentially clean the surface?”
The answer is no.
Sanding does not clean grease and grime off of cabinets.
It quite literally does the opposite. Sanding cabinets before cleaning them will do nothing but grind the contaminants into the wood and gum up your sand paper.
Cleaning cabinets before painting (and sanding) is crucial.
How to clean Oak cabinets before painting.
Dissolve TSP in hot water following the manufacturer’s directions on the box.
Spray 1 to 2 squirts of Spray Nine Degreaser on the cabinet surface.
Attach a brush attachment to a cordless drill. Dip the brush into the TSP/water solution, pulse the drill 2-3 times to remove excess water from the brush, and then place it on the cabinet surface.
Apply moderate pressure and hold the drill’s trigger so the spinning brush head can loosen and remove the grease and grime buildup on the cabinet’s surface.
Make sure not to excessively wet the wood during this process. Too much water on the surface can make the wood grain swell and cause the doors and panels to possibly warp.
Once the brush loosens the grease and grime buildup, scrub the entire surface with a microfiber rag wetted and wrung out with the TSP/water solution.
Repeat this process until all surfaces are completely free of grease buildup.
Be sure to focus extra attention around and above the stove as this area typically collects the most airborne cooking grease.
You will need to refresh your TSP/water multiple times during cleaning. It is shocking how fast the water turns muddy brown!
(Jump back up to table of contents)
Step 4: Sand wood with 120
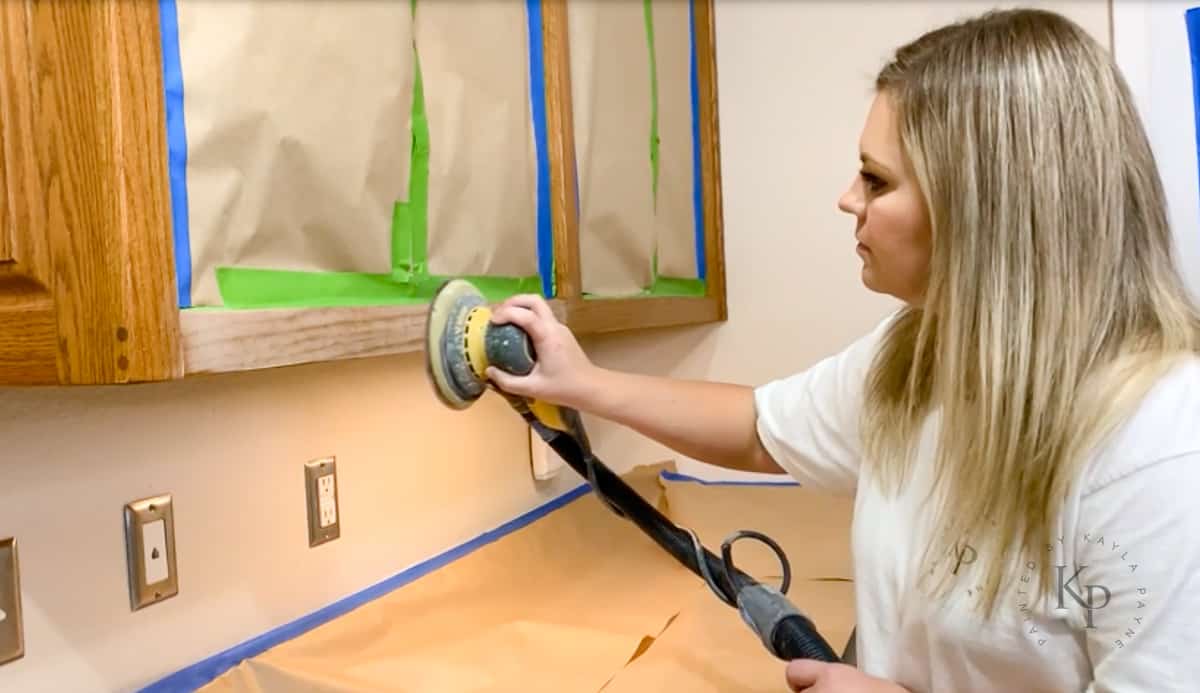
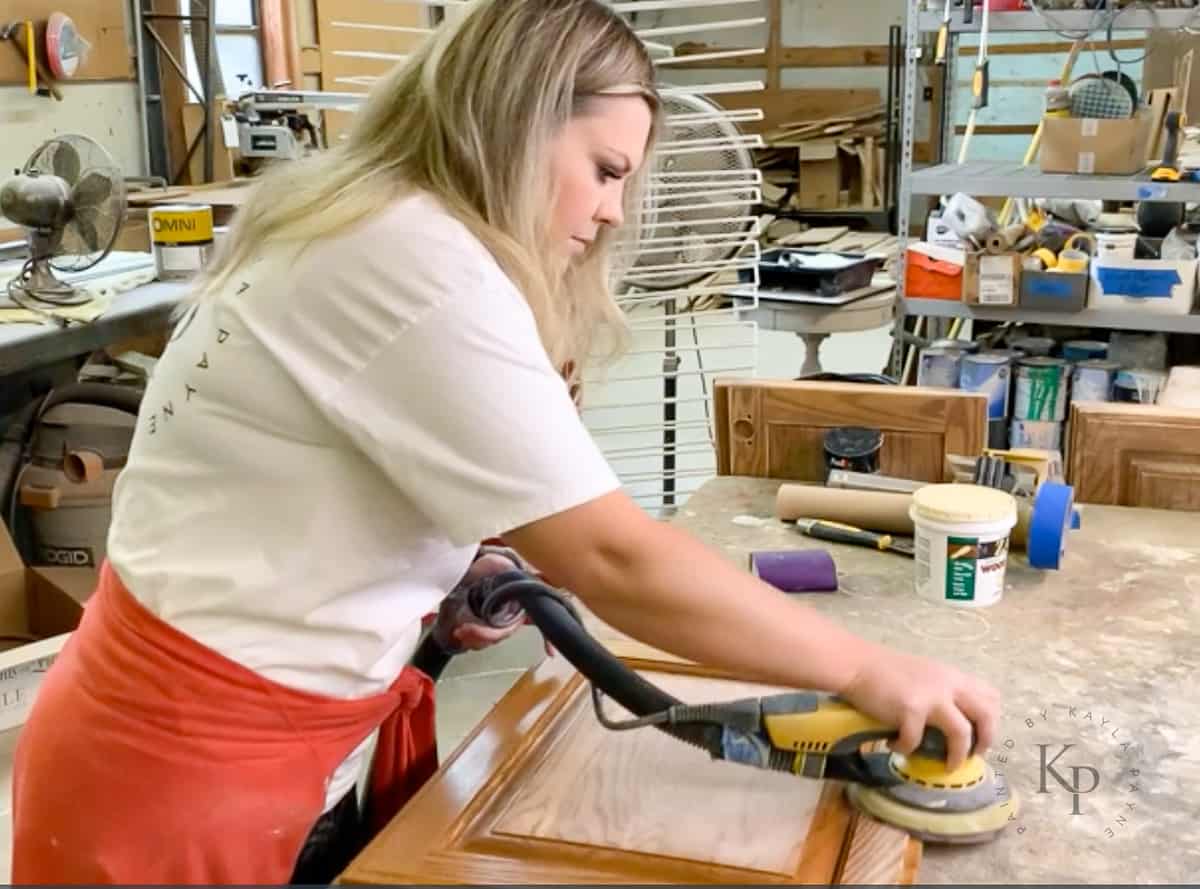
After the wood has dried from cleaning, use an electric orbital sander with 120-grit paper to remove most of the existing finish from the flat surfaces.
Sand the non-flat areas (edges, profiles, curves, etc) by hand.
It’s important to remove the existing finish as evenly as possible. Don’t sand more in one area and not enough in another area. Uneven sanding can leave a splotchy appearance in the paint’s final finish.
Sanding down to bare wood on the entirety of the surface isn’t necessary EXCEPT on the edges and corners.
Sand the edges and corners of all the cabinet doors, drawers and frames to bare wood.
Removing the existing finish off of the edges to reveal bare wood is an important step!
In order for the primer and (then subsequently the paint) to adhere to sharp edges and corners, there needs to be enough surface area for it to adhere to.
The sharper an edge or corner of a cabinet, the less surface area there is for the paint to adhere to. This makes the paint more prone to rubbing or chipping off.
However, if you sand off the sharpness of edges and corners, it increases the surface area for the primer and paint to adhere to.
(Jump back up to table of contents)
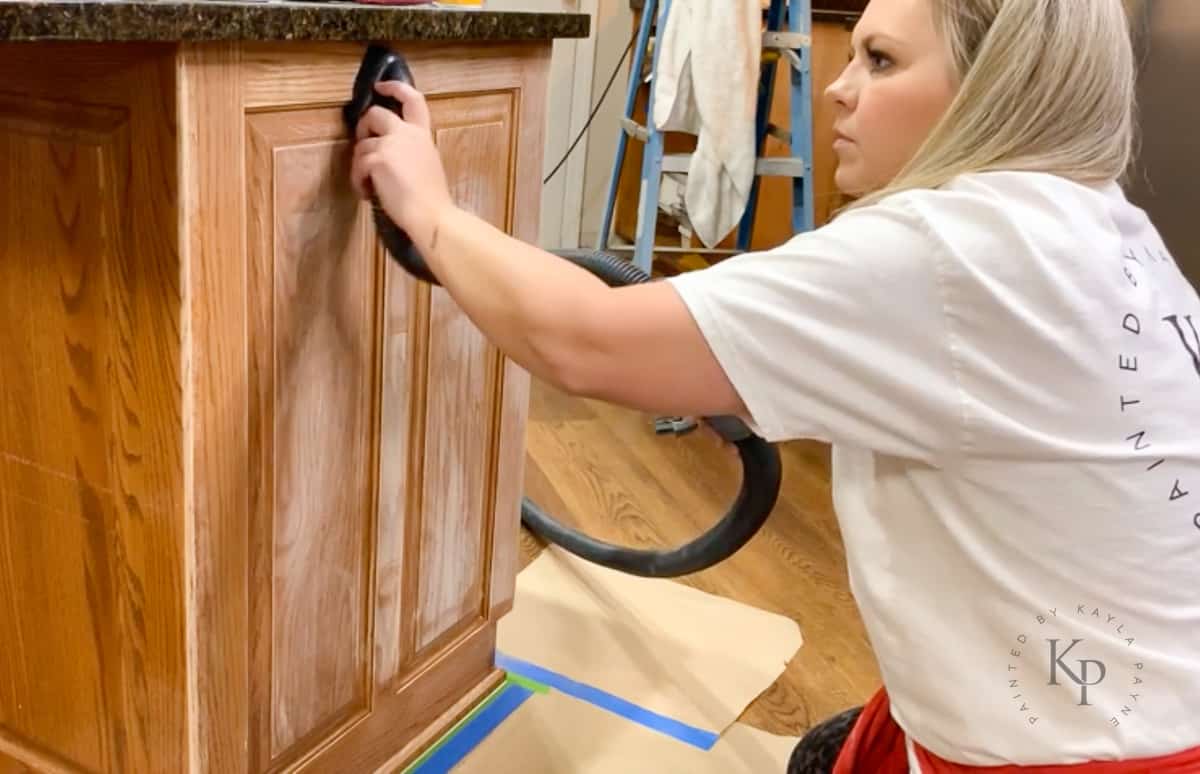
Step 5: Vacuum with brush attachment
The next step is to clean the dust created by sanding.
Attach a horse-hair brush to the hose of a vacuum, and suction every square inch of all surfaces.
I don’t like to use a ShopVac for this step – just a personal preference. But if you only have a shopvac, then use it. However, I think a household vacuum cleaner works better.
Wipe all surfaces down with a dry microfiber rag after vacuuming.
(Jump back up to table of contents)
Step 6: Tape and mask the working area
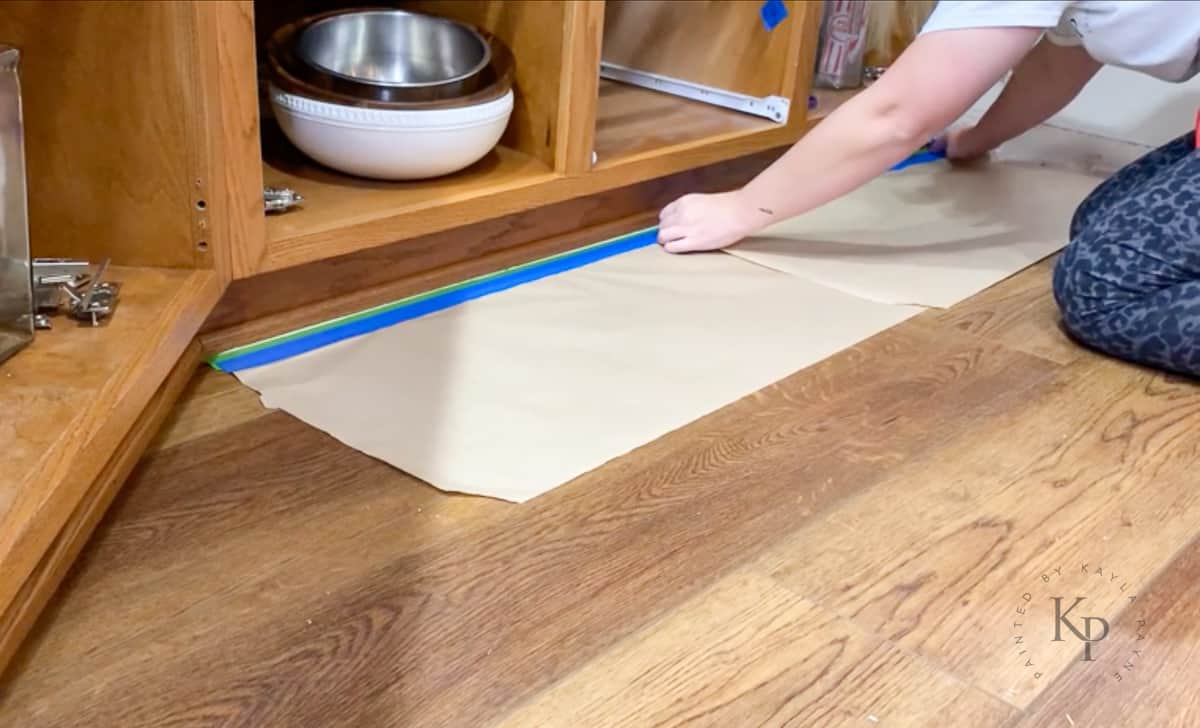
Put painter’s tape on the floor around the cabinet perimeter. Then tape down masking paper along the perimeter.
It’s unlikely that you’ll put masking paper down only once during the entire painting process. You will likely tape the paper down and pull it up several times before everything is completed.
Double taping in this way will allow you to take up the masking paper if/when needed but leave the tape along the cabinets so that you do not have to continue to re-tape a straight line between the cabinets and floor again and again.
Tape off any parts of the interior shelves that you don’t want to get paint on. Try to keep everything as neat and tidy as possible.
If the drawer fronts aren’t removable from the drawer boxes, then you’ll want to wrap the box with masking paper and tape it up if you’re spraying. This way no paint overspray gets onto the drawer boxes.
(Jump back up to table of contents)
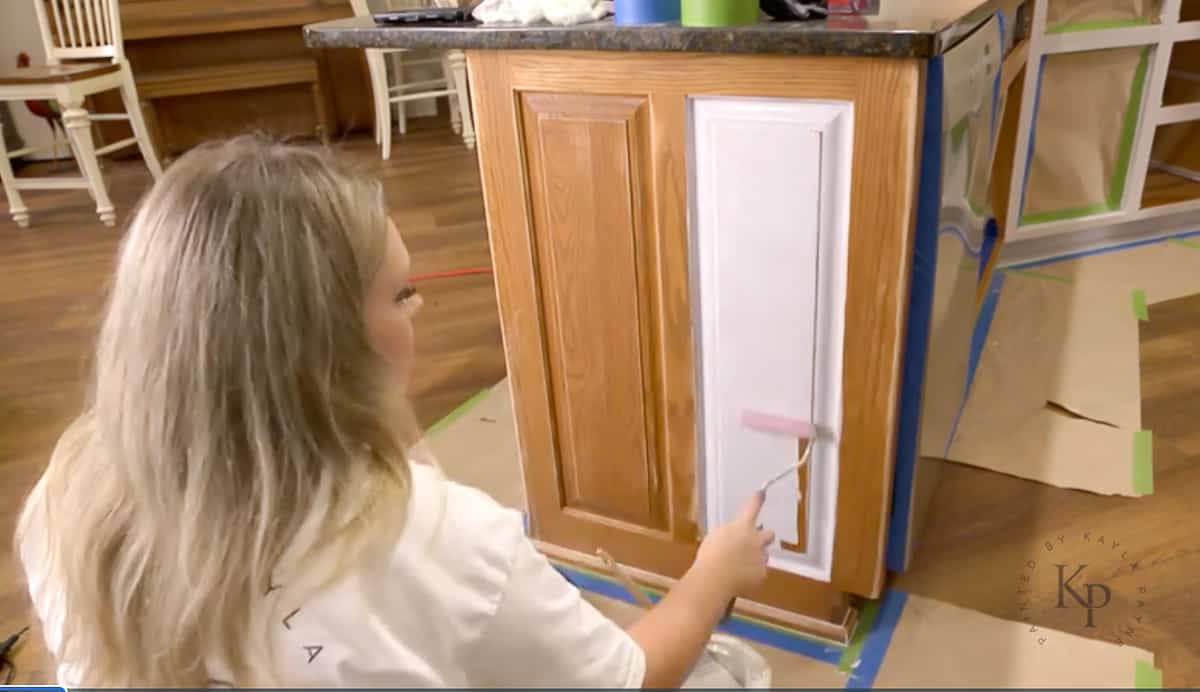
Step 7: Apply 1st coat of primer by roller/brush
Do you want to paint your Oak cabinets with a paint sprayer? If you said yes, that’s great!
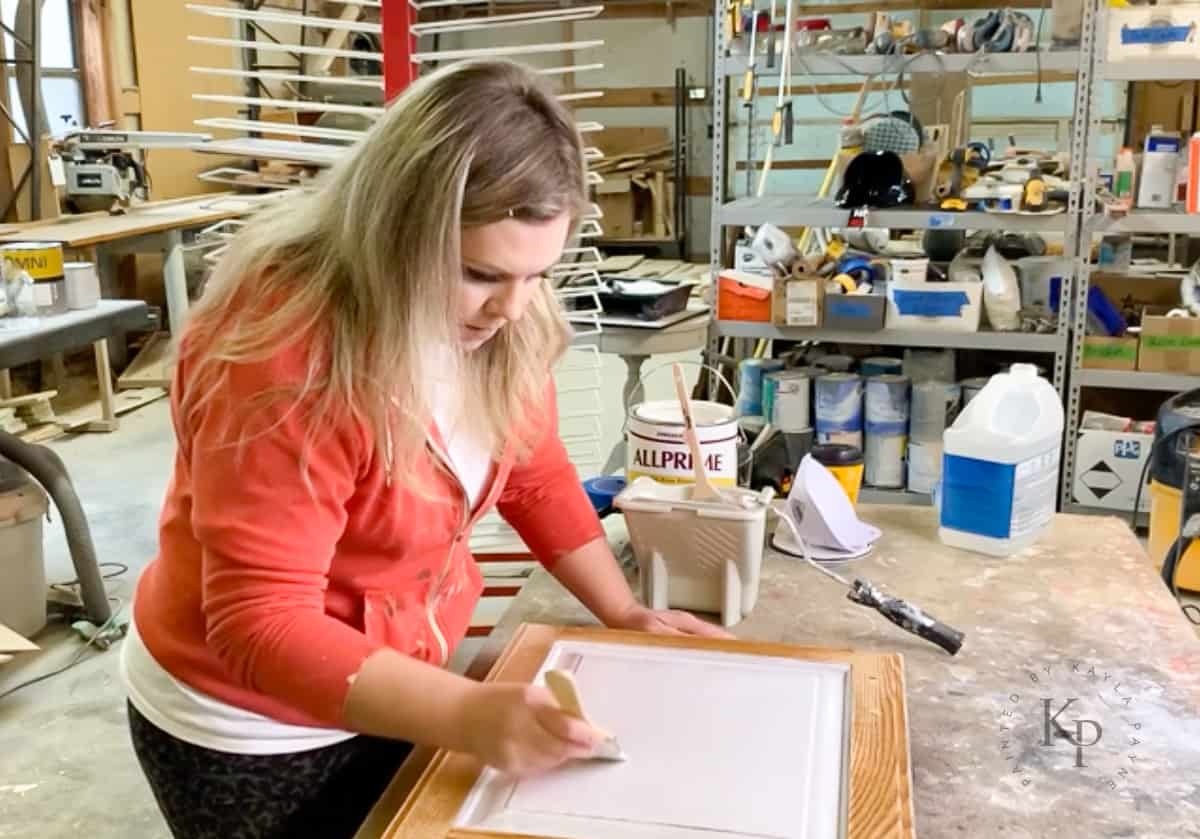
But here is my best pro tip for painting Oak cabinets; even if you plan to use a paint sprayer, brush your first coat of primer anyway.
Here’s why: brushing/rolling the first coat of primer will push the primer into the deepest parts of the wood grain and help fill the voids.
Spraying primer (or paint) results in it only sitting on the surface. There’s no way the primer to get down into the wood grain.
Since sprayed primer won’t be able to get down into the grain, there will be tiny black dots and lines on your cabinets as seen in the picture below.
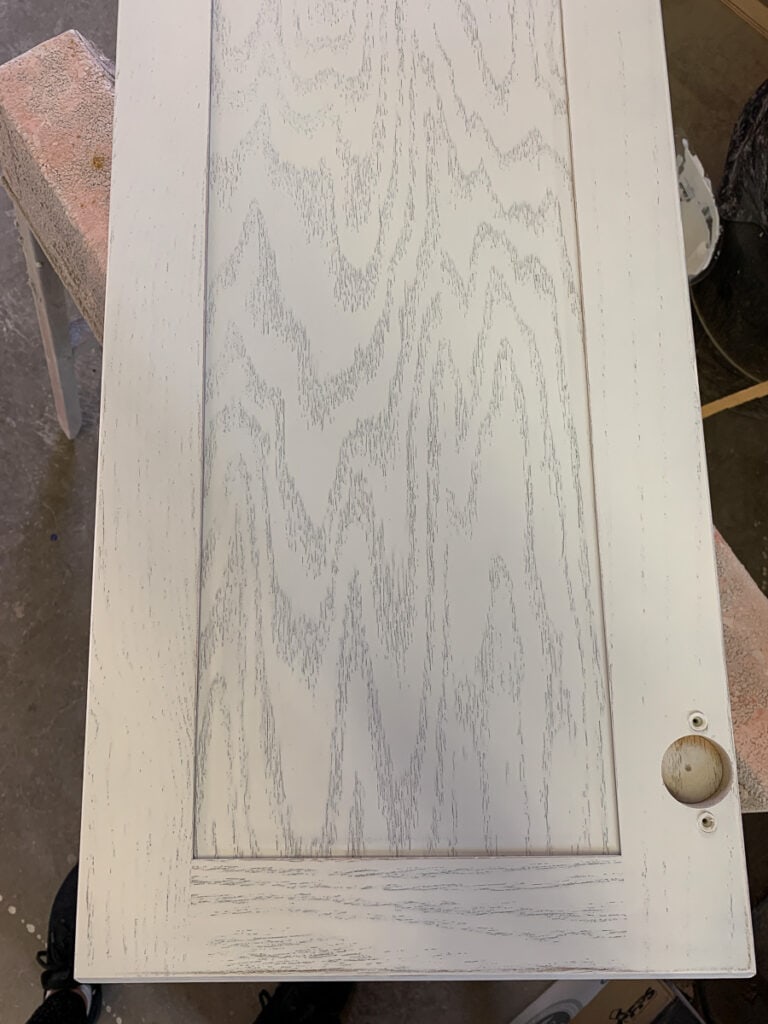
This is not a good look!
However, if you apply the first coat of primer by brush and roller, you won’t have this issue because brushing forces the primer into the grain voids.
After applying the first coat of primer by brush, you can use a paint sprayer for all subsequent coats if that’s your choice.
Keep in mind that it is important to roll and brush cabinets the right way so that the final result looks professional!
What is the right way to brush and roll paint on cabinets?
My advice for how to brush primer and/or paint on cabinets so that there are little-to-no visible brush marks is contrary to most advice online!
DIY influencers all over the internet typically advise using a small foam roller to paint cabinets.
But I disagree with this.
I teach students in my cabinet painting masterclass the “roll and tip method.”
What is the roll and tip method for painting cabinets?
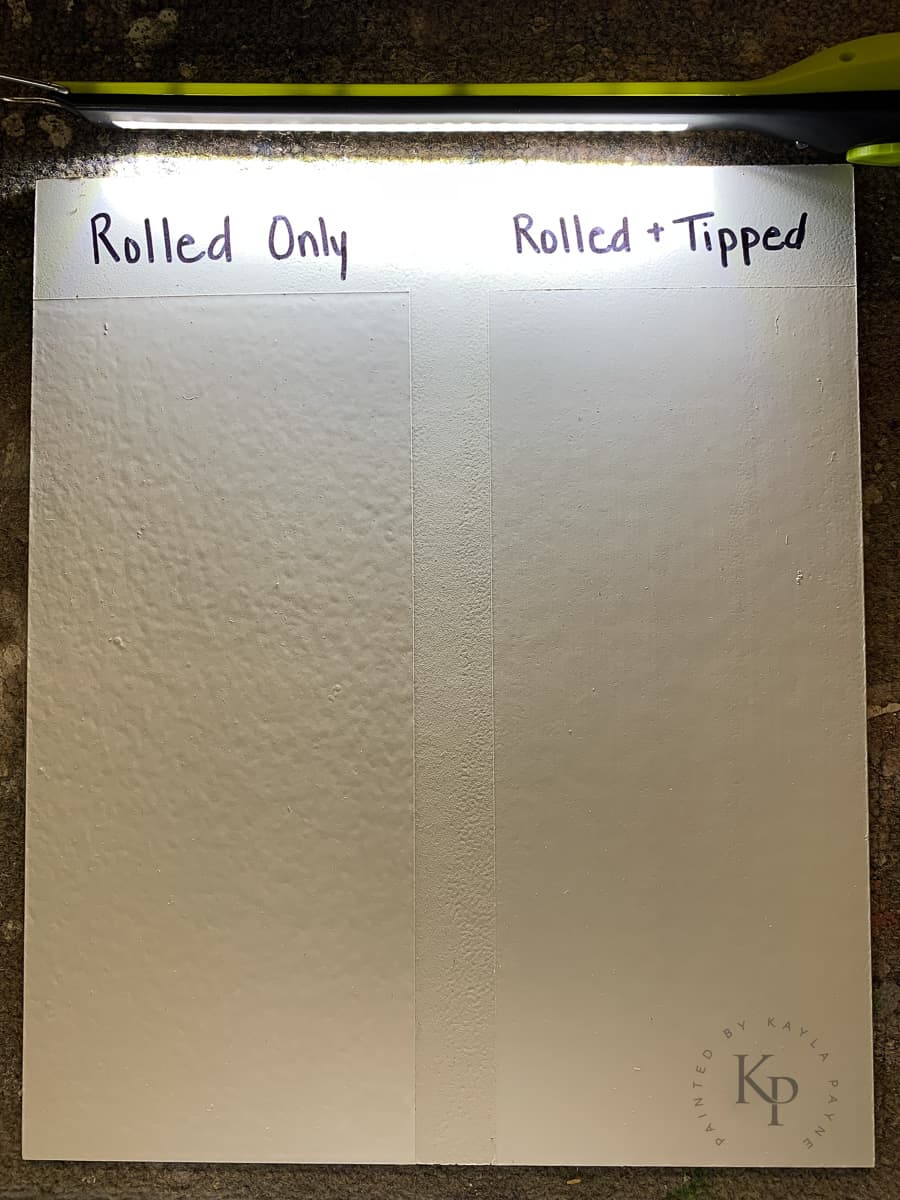
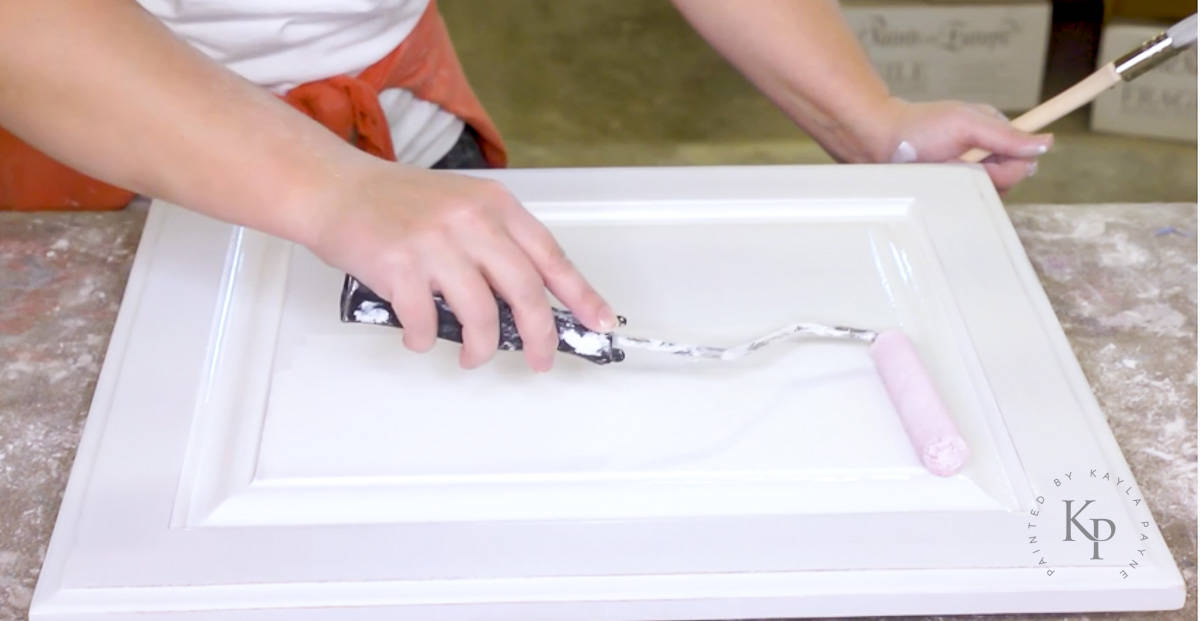
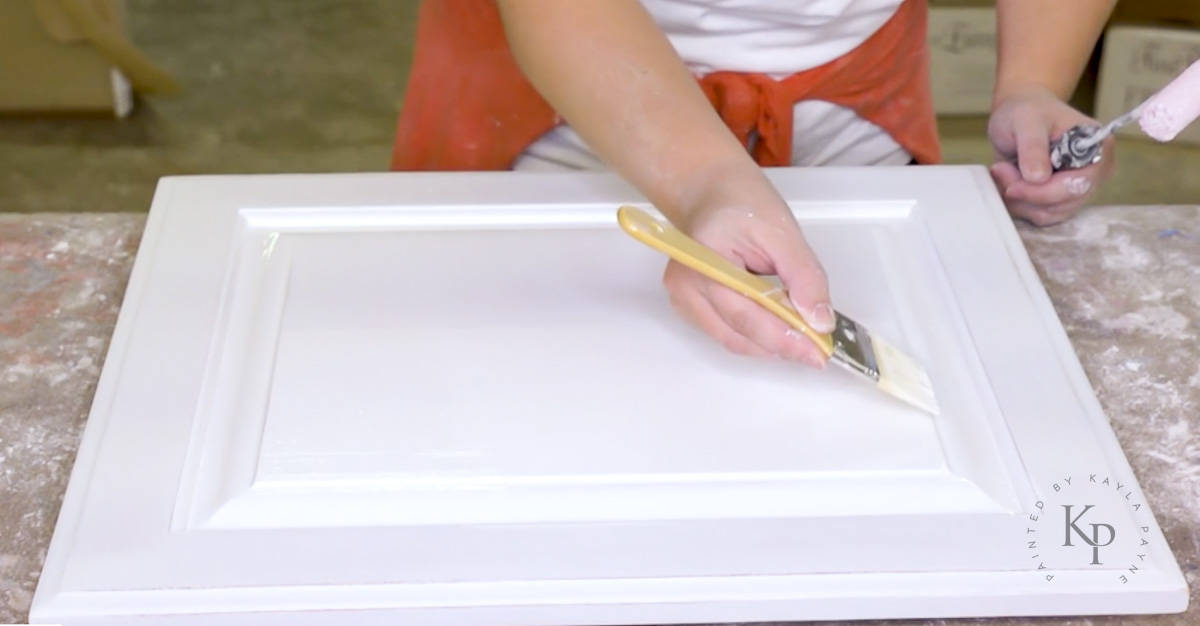
In a nutshell, the roll and tip method uses a 4” velour roller to evenly roll primer onto one small surface area then immediately use a Spalter paint brush to gently tip off the primer from beginning to end in one long, straight, and even brush stroke in the direction of the wood grain.
Rolling and tipping off, will leave neat and very faint brush marks instead of uneven, overlapped roller stipple texture.
In addition, brush marks that are tipped-off will self-level better than stipple texture from a roller.
A surface that is properly tipped-off results in a final finish that looks 100% more professional than paint applied with a roller alone.
Below is a sample that I made to show the difference between a paint application that was rolled only and one that was rolled and then tipped.
Here is one important caveat I want you to know when it comes to painting oak cabinets.
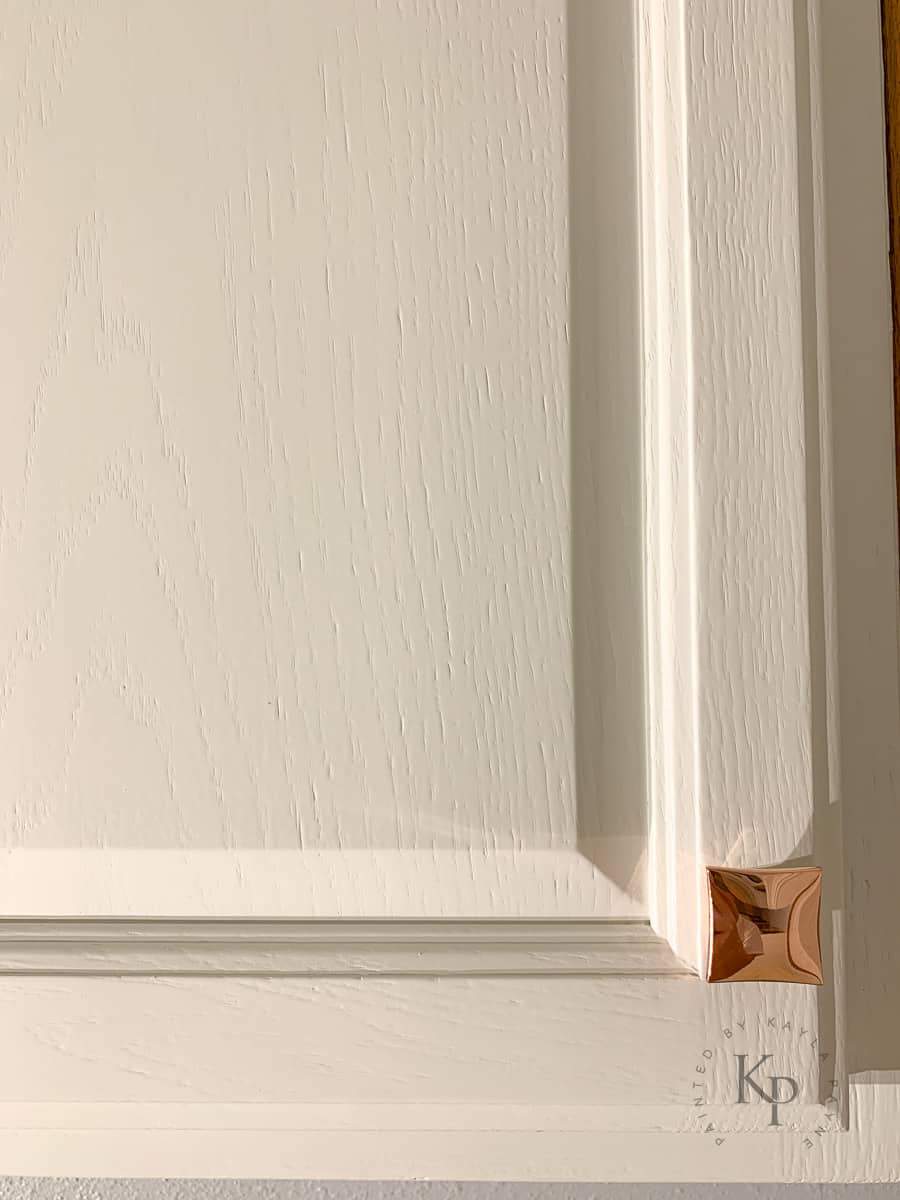
Primer and paint will not act as a grain filler.
Painting oak cabinets will not completely fill the wood grain to make the cabinets smooth and free of the visible grain patterns.
Below is a photo of an Oak cabinet door that has a heavy grain pattern. It has two coats of oil-based primer and two coats of Benjamin Moore Advance paint.
I applied the first coat of oil-based primer by using the roll and tip method. I sprayed the second coat of oil-based primer. Then sprayed two coats of paint.
If you want perfectly smooth cabinets without grain showing, go to this post and read about how to fill wood grain.
Priming and painting Oak (or any wood species with a deep grain pattern) will still allow the pattern of the grain to be visible. This is not necessarily a bad thing (unless of course, you hate seeing wood grain).
I just want you to have realistic expectations for your cabinet painting project to achieve the final result you desire.
What is the best primer to use on Oak cabinets?
Oil-based primer is recommended when painting Oak cabinets.
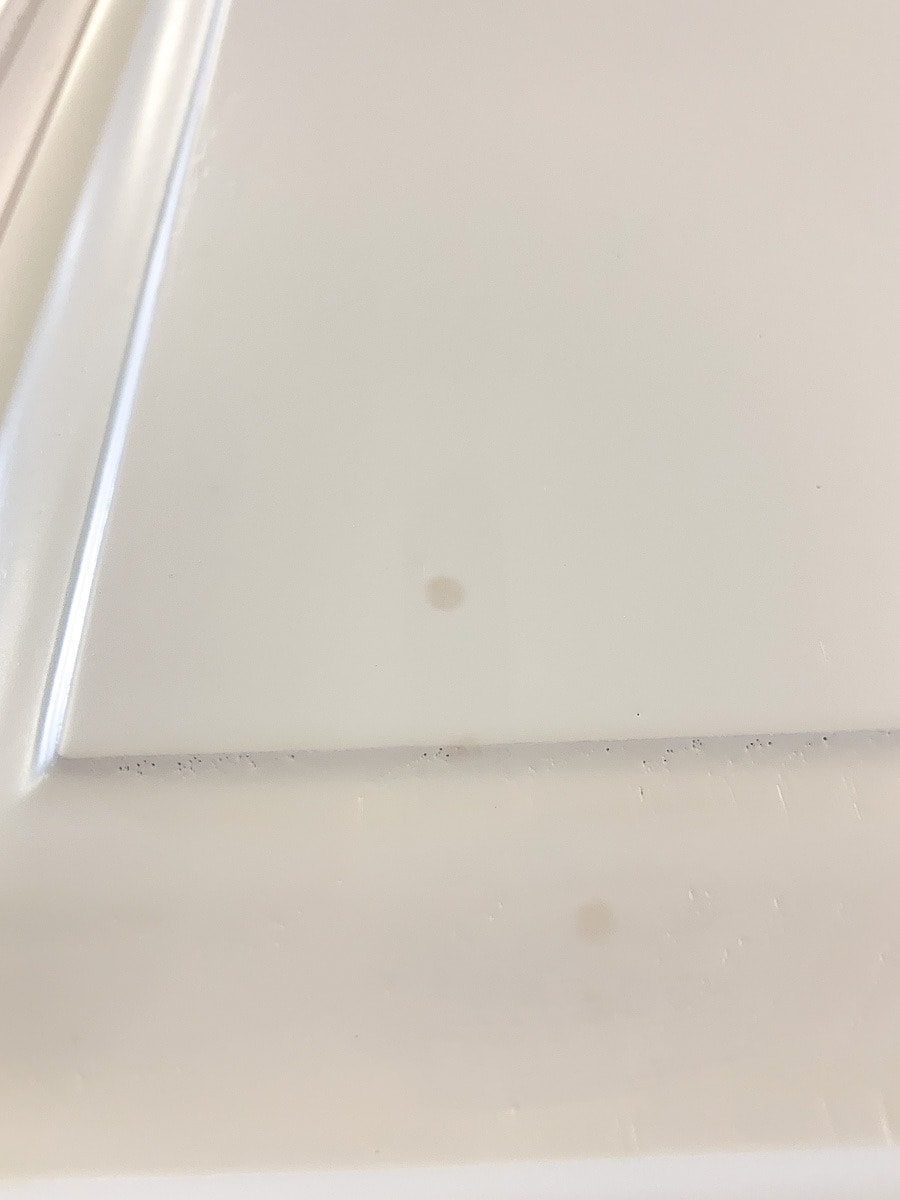
It is common for the grain in Oak to absorb grease and grime over time. Even with thorough cleaning in preparation for painting, it’s impossible to completely remove deeply embedded grease from certain areas of the wood grain.
The grease left behind will “bleed through” water-based and shellac-based primers.
Bleed-through refers to the seepage of contaminants, stains, and/or tannins from wood through an applied coating.
The best way to block bleed-through from happening on Oak cabinets is to use an oil-based primer.
The photo below shows what grease bleed-through looks like on cabinets. It’s not the best photo, but it’s the only one I have at the moment. See the small discolored spots?
(Jump back up to table of contents)
Step 8: Fill imperfections
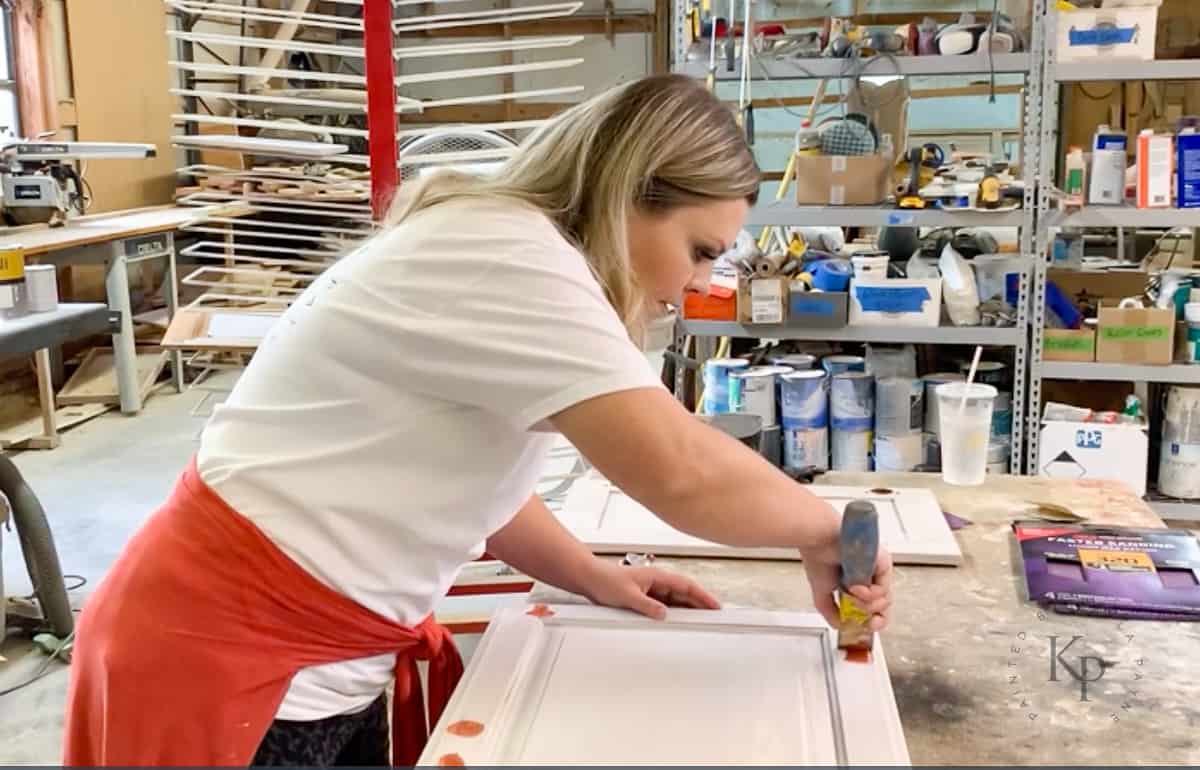
The next step is to fill imperfections. After applying a coat of white primer to the doors, drawers, and cabinet frames, you can easily see imperfections on the surface. In turn, this will make them easier to find and fill.
For dents, scratches, divots, cracks, etc larger and deeper than ⅛”, use wood putty to fill.
For imperfections smaller and shallower than ⅛”, use Bondo Glazing and Spot Putty to fill.
Use a metal blade putty knife for the best results.
Press the filler into the blemish firmly, and leave it proud of the surface. Allow to dry.
(Jump back up to table of contents)
Step 9: Sand with 220 then clean
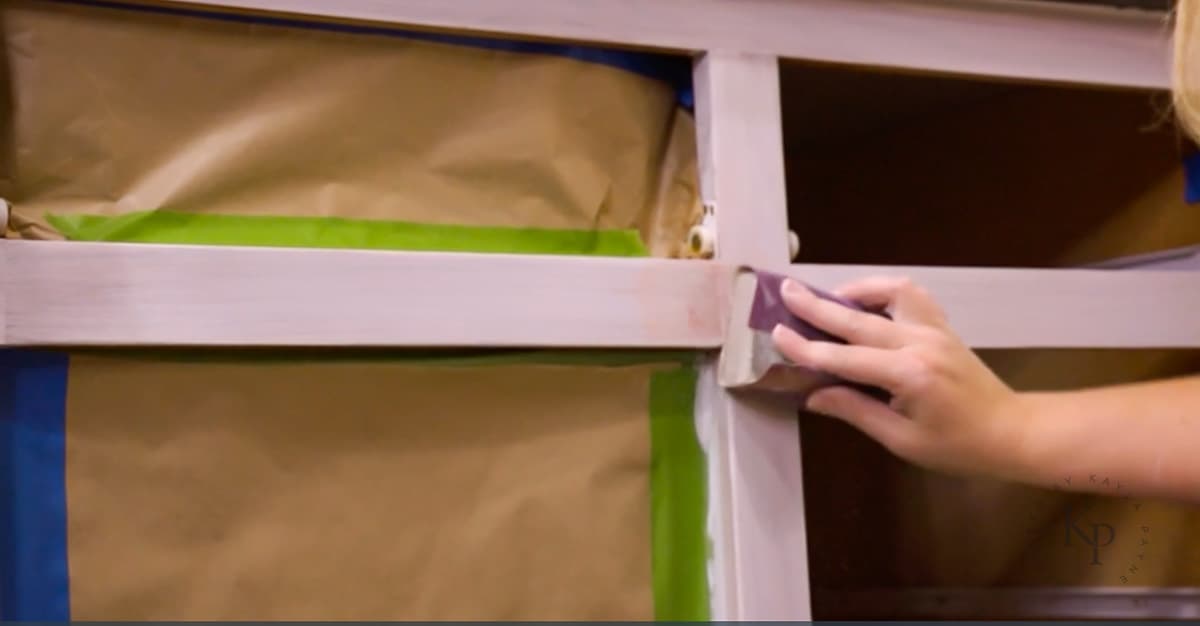
Magic happens in this step! Use 220 grit sandpaper wrapped around or attached to a hard sanding block to hand sand the primer until smooth.
When the oil-based primer is sufficiently dry, it will sand to a fine powder. If you begin the sanding process, and it’s gumming up the sandpaper instead of creating a fine powder; then stop sanding.
Allow the primer to dry longer before you try sanding again.
So, why not use an electric orbital sander for this step?
Well, you could use an electric sander. However, it’s easy to remove too much primer because you have much less control with the machine.
Hand sanding really won’t take that much more time, and you’ll have so much more control over what you’re doing.
Hand sanding primer in this step is much different than sanding the wood surface described in Step 2.
It will only take a few manual passes by hand for the primer to become smooth.
Any areas that can’t be sanded with the block, use a folded piece of paper held with your fingers.
After the primer is sanded on all the doors/drawers, repeat the vacuuming step.
Then wipe all surfaces down with a clean microfiber rag dampened with denatured alcohol (don’t forget to wear gloves).
Then use a tack cloth to make sure every bit of dust is gone.
(Jump back up to table of contents)
Step 10: Prime 2nd time
Next, it’s time to apply primer coat number two.
If you choose to use a paint sprayer, now is the time you spray the second coat of oil-based primer on the doors and drawers.
If you are not spraying, then repeat the roll and tip method of brushing the second primer coat.
It’s very common to use a paint sprayer on the cabinet doors and drawers since they can be taken outside. Then use a roller and brush to paint the cabinet boxes and frames inside your home.
This hybrid approach of both spraying and brushing is what I typically recommend for beginners.
You might be wondering if two coats of primer are necessary.
Yes, I strongly recommend two primer coats!
It’s likely that a bit too much of the first coat was sanded away leaving exposed wood in some areas.
Coat number two will even out and seal the wood filler applied to the imperfections. Plus further ensure that no bleed-thru will occur.
You’ll never regret doing the extra work it takes for two primer coats, I promise.
(Jump back up to table of contents)
Step 11: Sand with 320 then clean
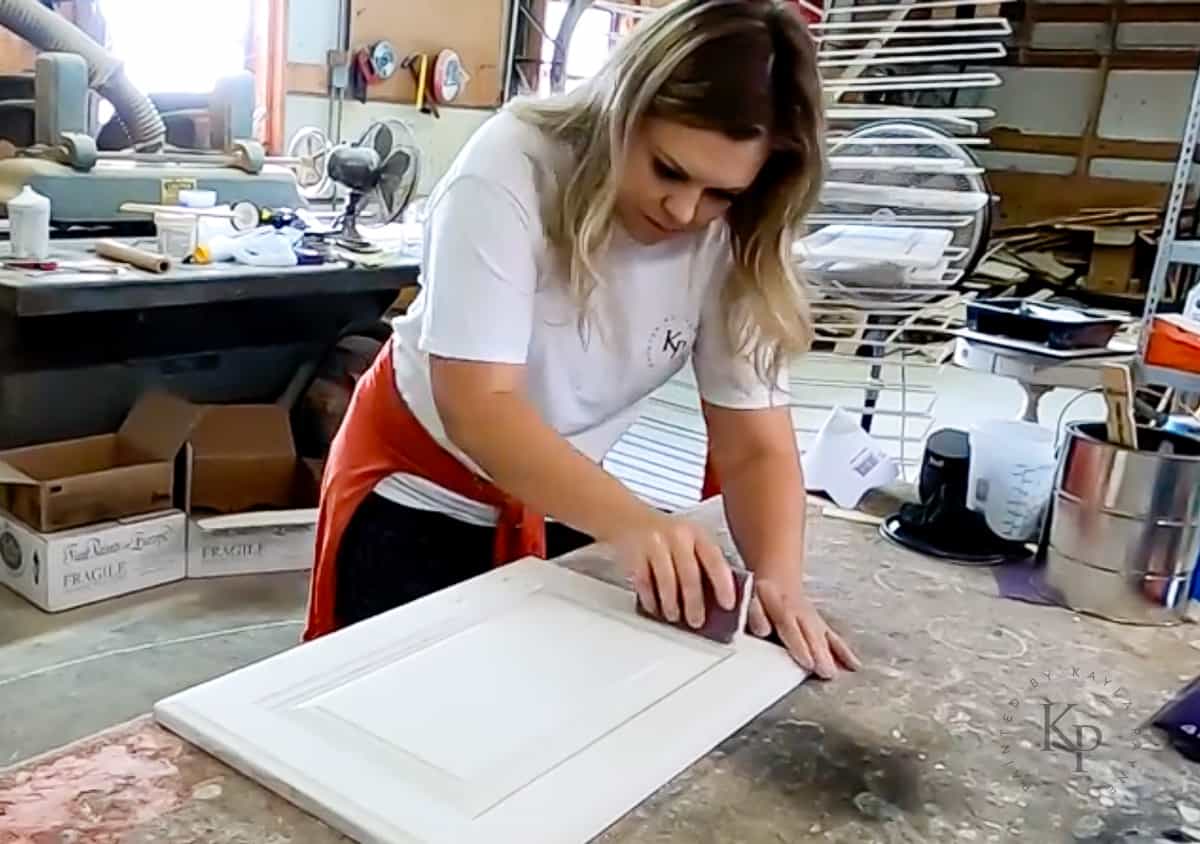
After primer coat two is fully dry, sand with 320 grit.
Again, it is a good idea to sand by hand instead of using an electric sander.
Be careful not to remove too much primer along edges and corners. Do the best you can to not expose any bare wood. The primer simply needs a light sand to make it extra smooth.
You’re probably thinking, “OH MY GOSH this is too much work – so much sanding!!”
Trust me, hand-sanding primer doesn’t take too much time.
It’s a fast process, and IT IS THE SECRET to a professional finish. You’ve been searching the internet for the secrets the pros have, right?
This is it. You found it:)
After this step, the cabinets will feel as smooth as silk.
(Jump back up to table of contents)
Step 12: Caulk seams
After the priming process is complete, then it’s time to caulk seams and gaps.
The main areas of cabinets that need caulking are:
- Where the crown molding (if present) meets the ceiling and meets the cabinet face frame
- Where the cabinets meet the walls
- Seams where any other applied moldings contact the cabinets (think baseboards, shoe molding/quarter round, flat stock moldings etc)
I don’t recommend caulking any floating panels within the doors/drawers or end panels.
Caulking a floating cabinet panel increases the likelihood of the caulk cracking.
Wood naturally expands and contracts with the change in temperature and humidity.
A cabinet panel is constructed to be able to move independently of the surrounding stiles and rails.
Caulking the seam/gap between the panel and stiles/rails does not prohibit the wood from expansion and contraction.
Therefore, when the wood inevitably moves, the caulk will almost always crack.
In summary, the small, visible seam where the cabinet panel meets the stiles and rails is supposed to be there. It should remain free of caulk, wood filler, primer, and paint.
How to caulk cabinets before painting.
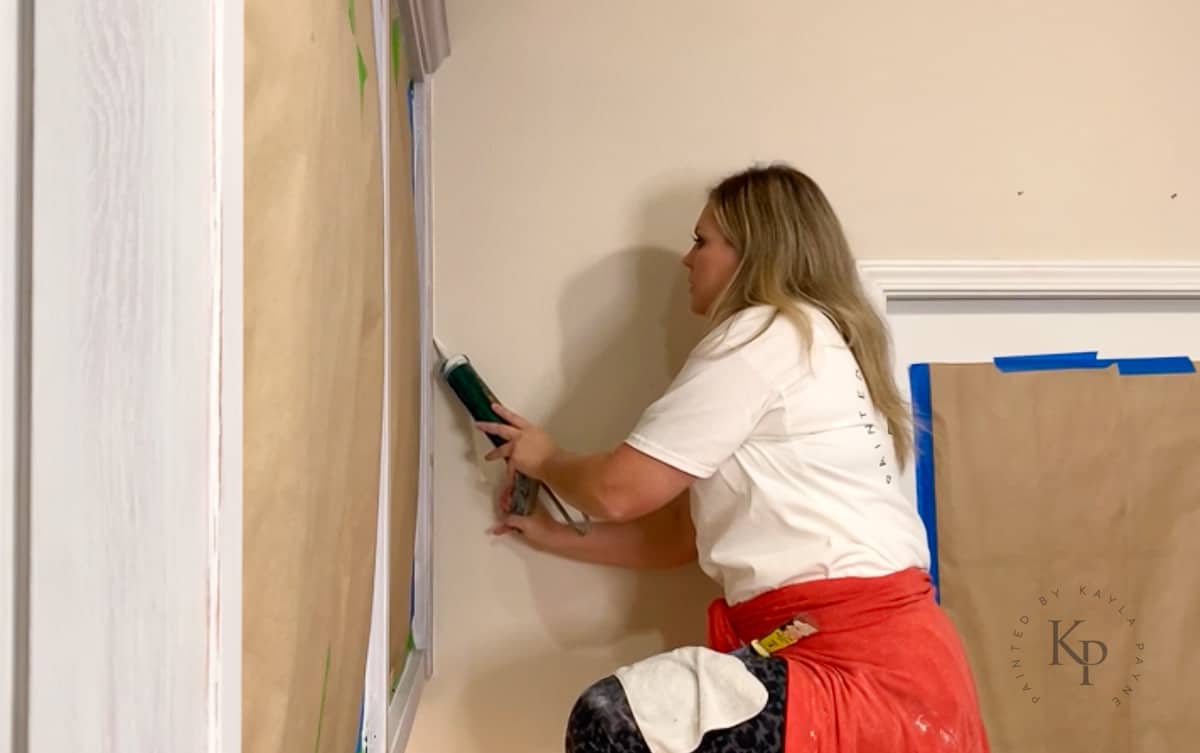
Use a razor to slice the tip off of the tube of caulk at a 45-degree angle. Cut the hole very small, as you’ll only need a thin bead of caulk.
Fill a small bucket with clean, warm water.
Wet and thoroughly wring out a clean microfiber rag until only damp.
Squeeze the caulk gun trigger while simultaneously pulling the gun along the seam. Work in two foot sections.
Dip your pointer finger into the bucket of water. Then use your wet finger to smooth the caulk bead into the open seam.
Wipe excess caulk onto the damp cloth. It’s important to remove as much excess caulk as possible. Be sure to wipe the caulking off of the cabinet and surrounding areas.
If you don’t wipe off the excess caulk, it will show after painting.
Nothing shouts “This was an amateur paint job” louder than badly caulked cabinets.
Something else to keep in mind, caulk doesn’t sand off after it’s dry. Removing dried caulking is not fun, so be sure to keep it nice and neat while wet.
Allow caulk to dry completely before moving on to the next step. Painting over caulk that is not fully dry can lead to cracking.
(Jump back up to table of contents)
Step 13: Apply 1st paint coat by roller/brush or sprayer
Next, it is finally time to paint!
What is the best paint for Oak cabinets?
I recommend homeowners and DIY’ers use Benjamin Moore Advance in Satin Finish. Advance is a high quality waterborne alkyd paint. You might wonder, “Can water-based paints go on top of oil based primer?” The answer is yes.
There are many brands and types of paints on the market to choose from. But in my opinion, Benjamin Moore Advance tics most of the boxes when it comes to a great cabinet coating for homeowners to use.
✅ It’s readily available almost everywhere
✅ Easy to use – even for beginners
✅ Self-levels wonderfully
✅ Cleans up with soap and water
✅ Low VOC and very low odor
✅ The satin sheen has a pretty glow
Now it’s true, there are other coatings that may offer a harder finish that can endure more extreme wear and tear longterm.
However, most of these coatings have drawbacks that prohibit me from recommending that DIY’ers use them.
These cons include but are not limited to:
- Very fast dry-times making it impossible or nearly impossible to brush.
- Most of these coatings are spray-only applications.
- They contain harmful isocyanates that require specialized equipment to safely remove from the ambient air for your safety.
- They need to be catalyzed. Catalyzation means a chemical hardener is mixed with the coating for added hardness. This also gives the paint a “pot life”. Pot life is the length of time a catalyzed coating is usable before expiring. After that window of time has passed, you must discard any remaining coating as it’s no longer usable.
- Many of these coatings are for professional use only. Persons not in the painting trade are usually unable to purchase them. Therefore, acquiring and applying it requires a professional painter.
- They can be very expensive.
- There’s very little margin for error. The stakes are much higher using these coatings. For best results, you need experience.
It’s for these main reasons that I recommend homeowners use Benjamin Moore Advance when painting cabinets.
If your heart is set on using a professional-only, 2k coating system, I recommend calling in a qualified painting professional. It is best to hand the reigns over to them.
Is Benjamin Moore Advance, okay to use on cabinets?
I don’t want to leave you questioning if Advance is good enough to use on cabinets. I’ve personally used this exact paint on cabinets in hundreds of homes.
Want to know how many clients have called me back to complain of a paint failure? Zero.
Keep in mind, that no paint coating is bulletproof. Every single paint and paint system has pros and cons. I want to present you with enough information so that you can make up your mind about what’s best for you!
(Jump back up to table of contents)
Step 14: Sand with 400 (if needed)
After waiting for the manufacturer’s recommended re-coat time, sand the first paint coat IF needed.
This step is optional. If the first coat of paint looks and feels good, you don’t have to sand it before applying the second coat.
There is a caveat to this. Don’t wait too long between paint coats, or else you will need to sand.
For example, if you can’t apply the second coat within 2-3 days of the first, sand with 400 grit before applying another coat. This will ensure proper adhesion.
So keep in mind, there’s a small window of time to re-coat without a required sanding.
(Jump back up to table of contents)
Step 15: Apply 2nd paint coat
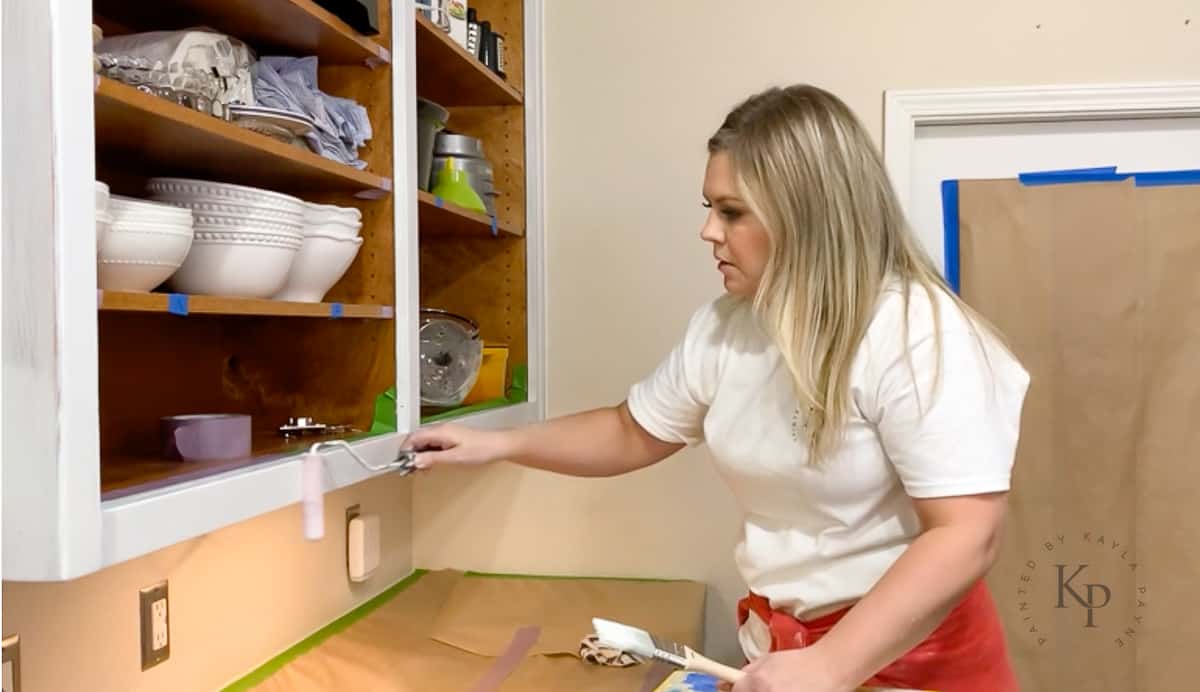
No need for me to keep being so wordy here, right? The next step is to apply the second coat of paint the same way you applied the first coat.
Always remember that 2-3 thin layers of paint are always better than 1 thick layer.
A third coat could be needed in some instances. Use your best discretion. If the paint is fully opaque and looks good, then the painting portion is complete!
However, if the paint looks thin, spotty, splotchy, or uneven then apply a third coat following the same steps listed above.
(Jump back up to table of contents)
Step 16: Re-assemble the cabinets
After the paint dries for a minimum of 48 hours, it is time to reassemble the cabinets.
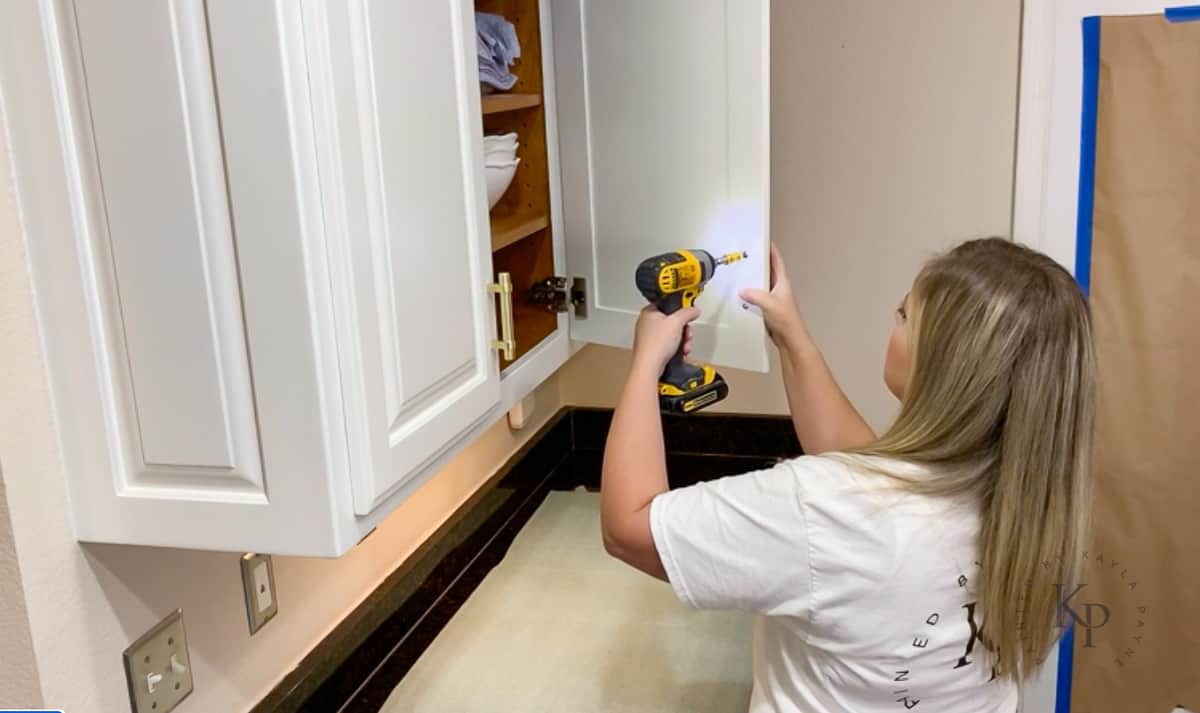
Re-assembly will be easy because everything was carefully labeled in the beginning. Match the doors where they go and put the hinges back in the same location they were removed from.
Install knobs and/or pulls to the doors and drawers.
Don’t forget to install silicone bumper pads to keep the paint from sticking to itself.
It can take up to 30 days for the paint to fully cure, so be extra gentle for a while.
Now you know exactly how to paint your oak cabinets!
Yes, painting cabinets is an involved process. But it’s one that you can certainly do yourself as long as you have the desire and the patience.
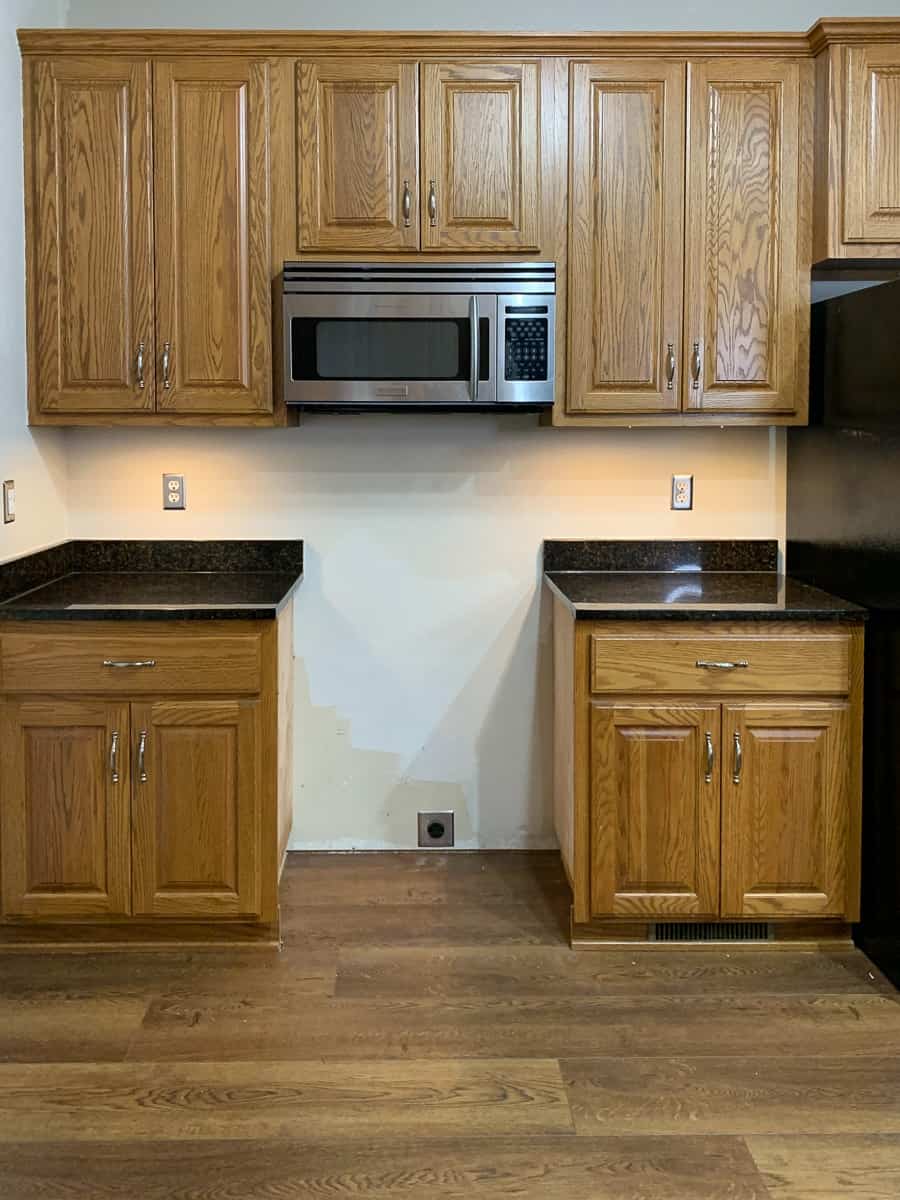
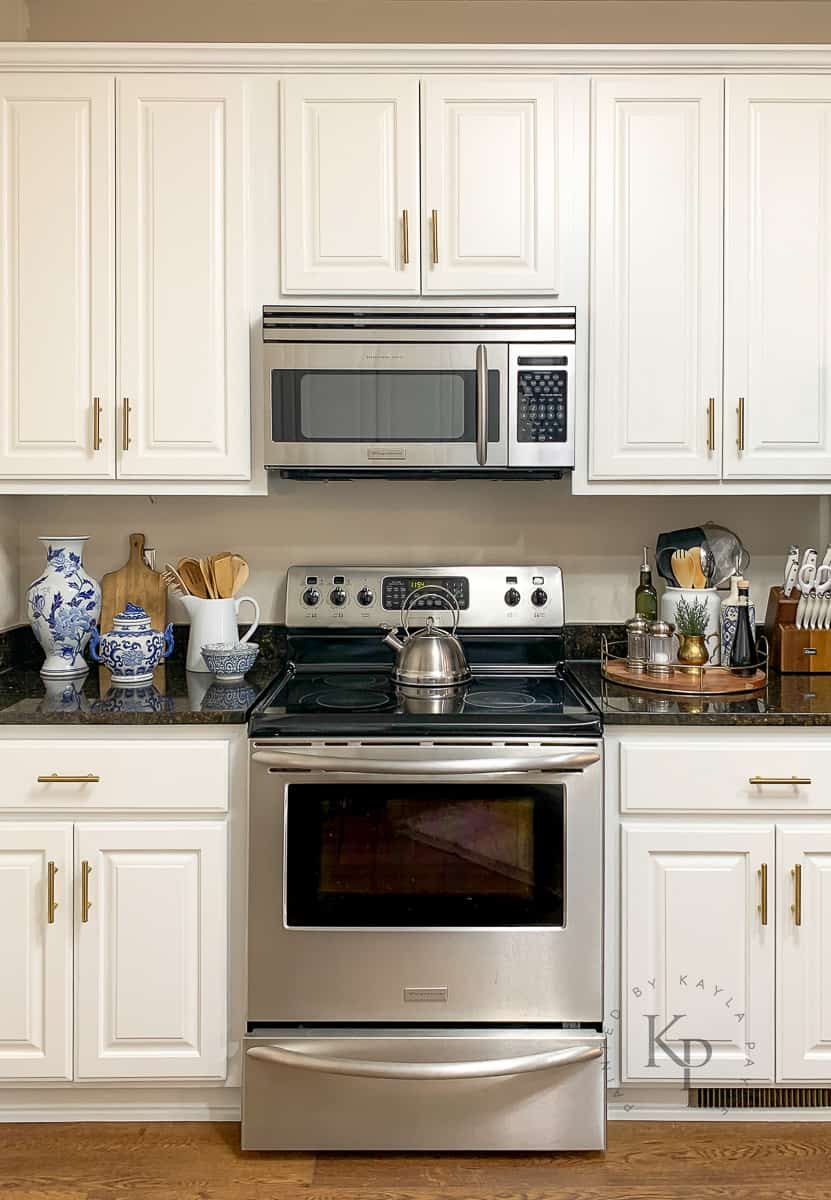
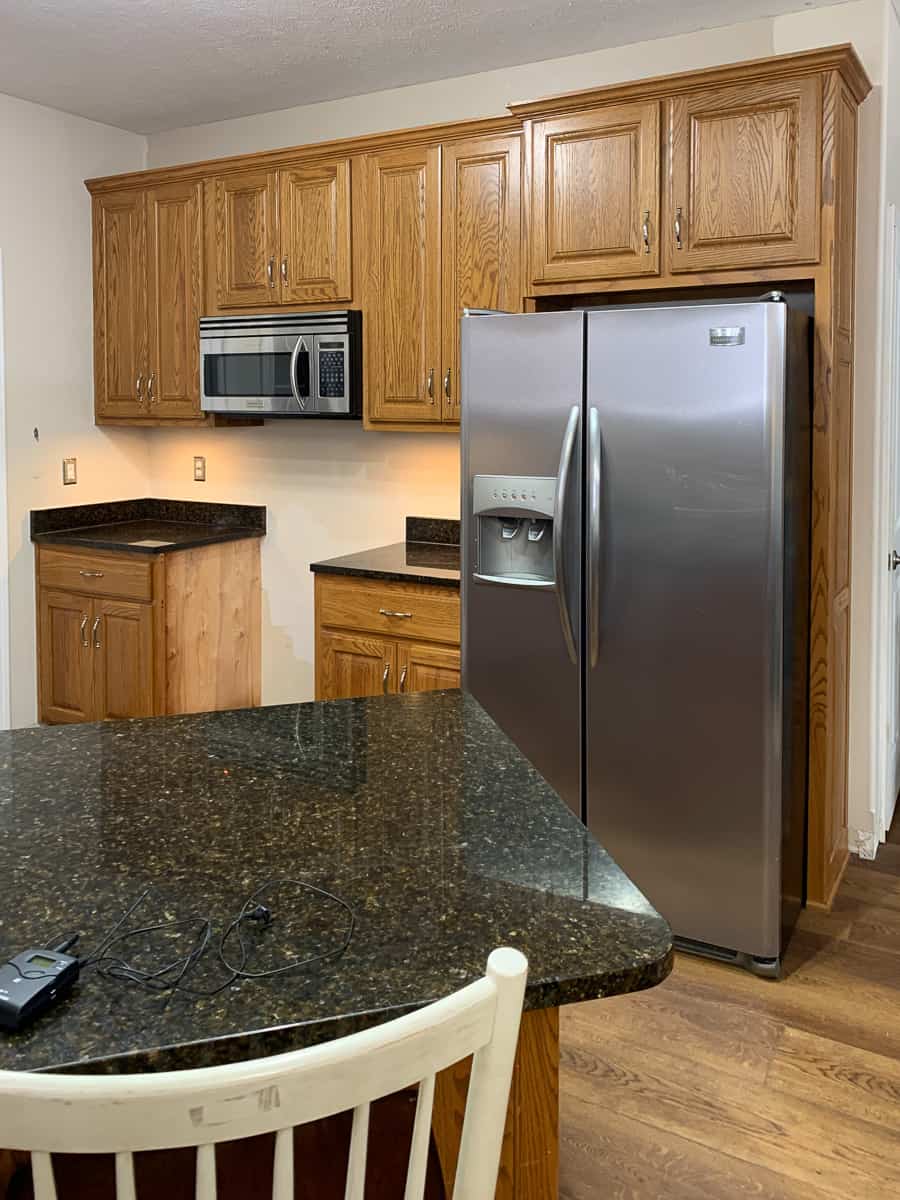
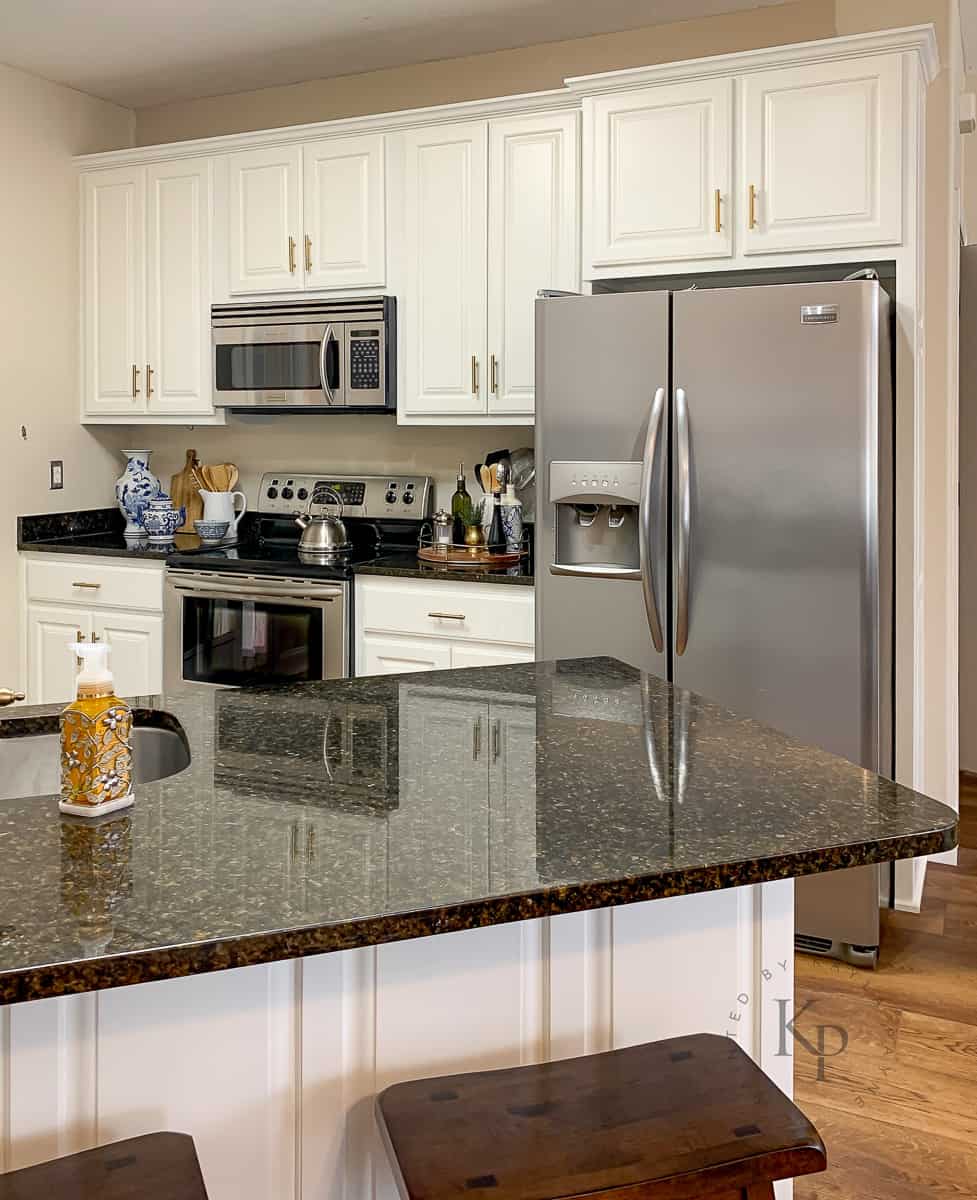
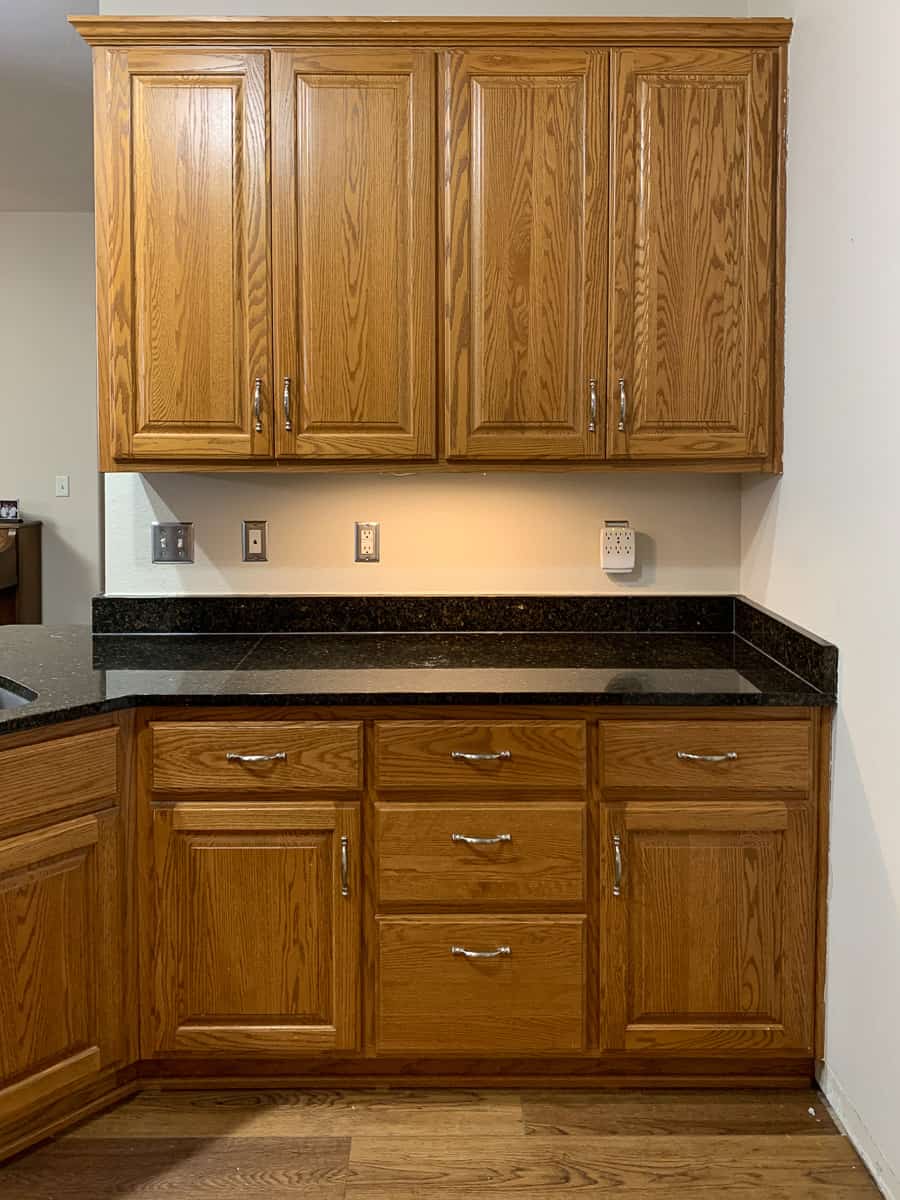
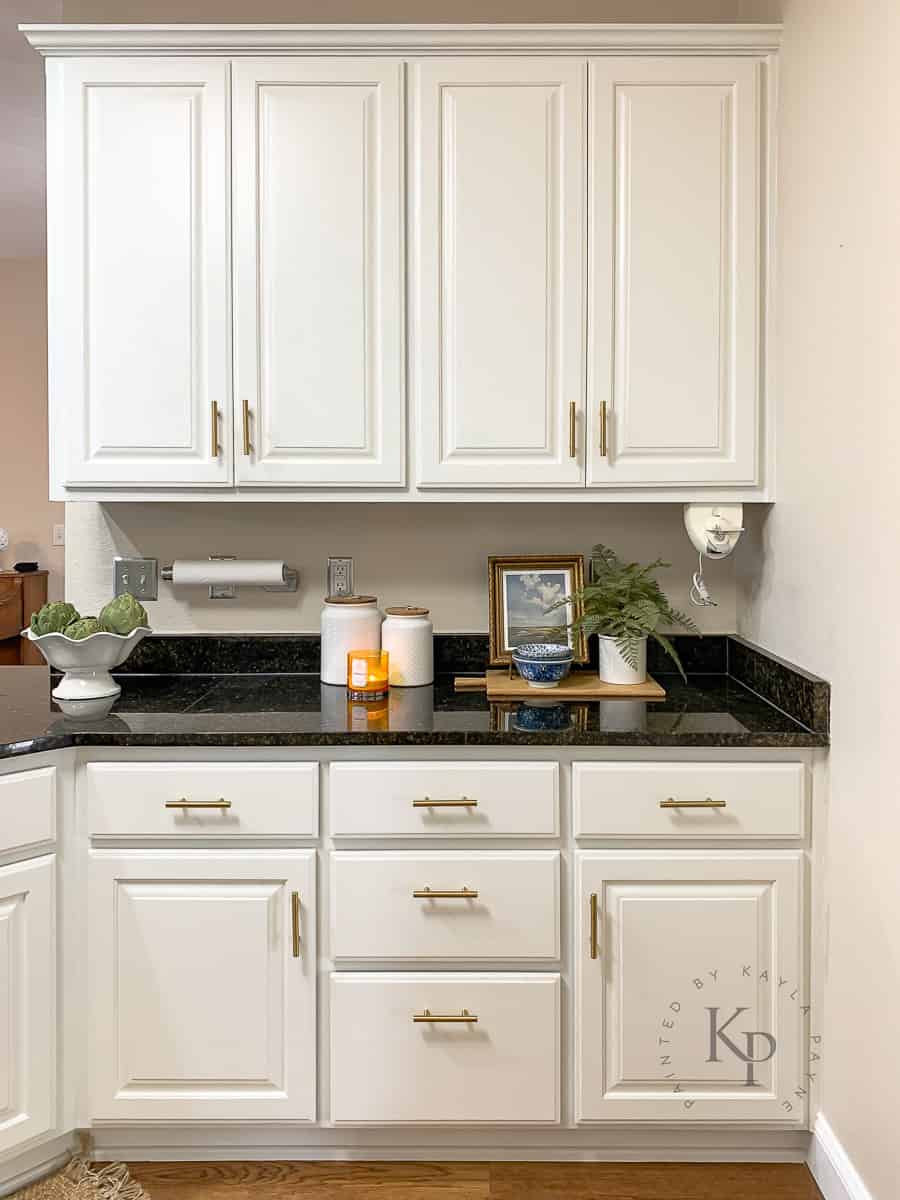
Let’s take a look at some before and after painted oak cabinet transformations…
Read More About Painting Cabinets


Leave a Reply