When you buy, paint and sell furniture, the point is to make a little bit of profit, right? Well, this is a story about how I got hosed on a furniture flip lol. Okay…maybe “hosed” is an exaggeration. But by the time I was finished with it, there was not nearly enough profit to consider this one “worth it.”
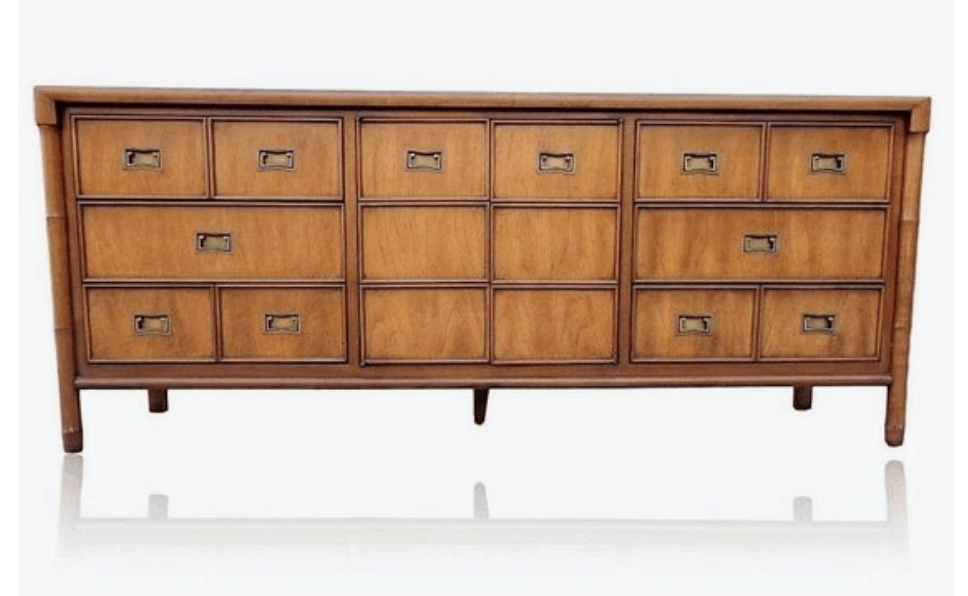
A furniture picker from out of state sent me a dark, grainy cell phone picture of this dresser. I saw that it was campaign style and had faux bamboo details. So without asking any questions, I enthusiastically told the picker that yes, I’d take it!
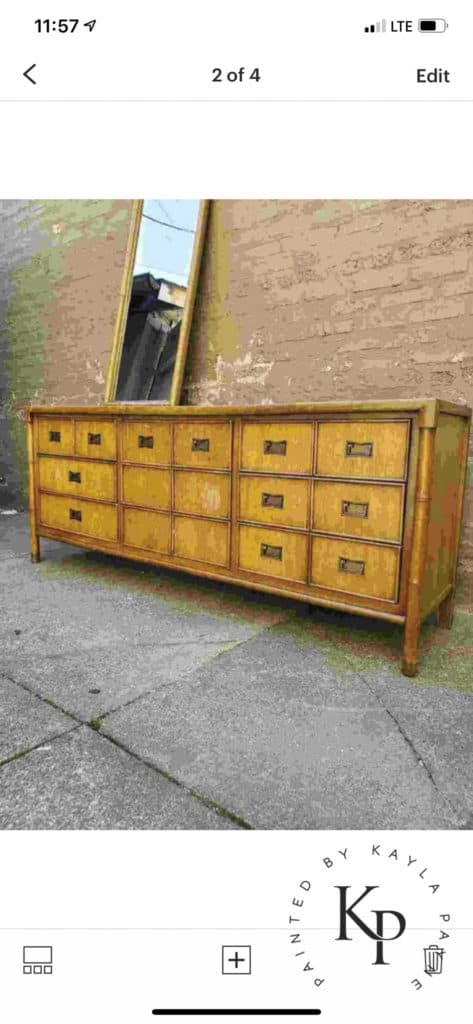
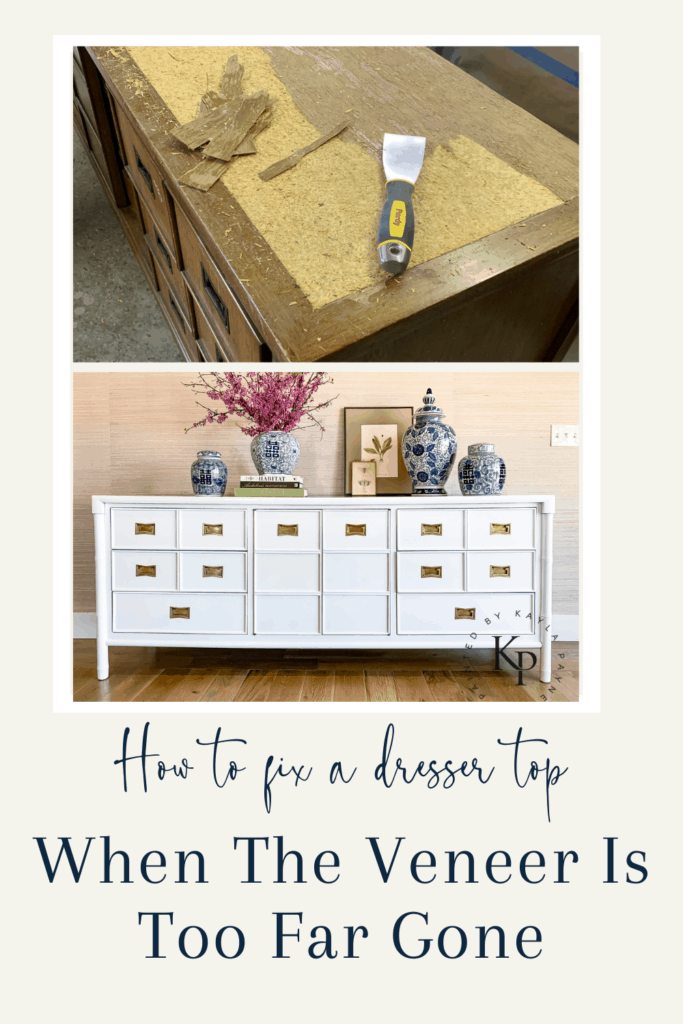
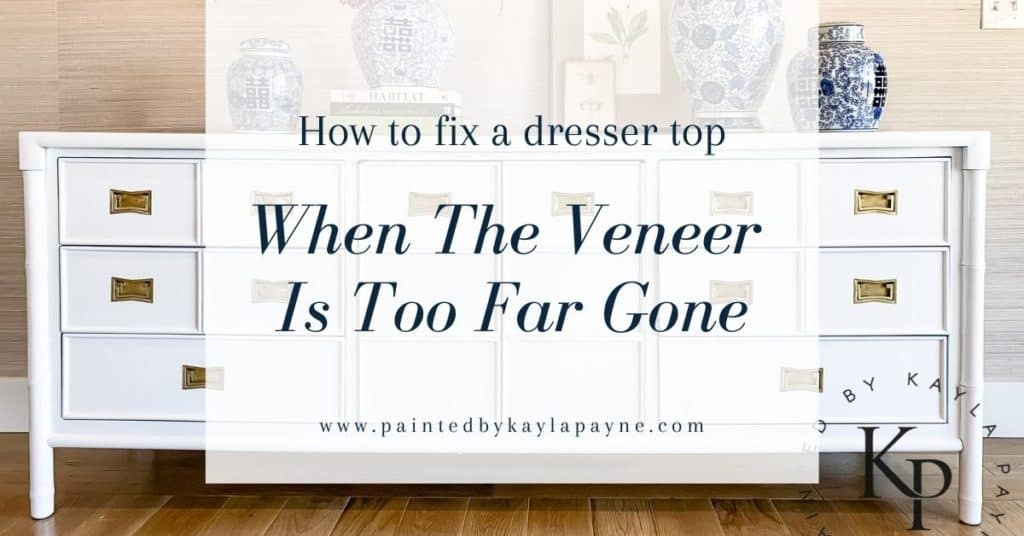
Once it arrived to me, I immediately regretted it as this was one dresser I should’ve never bought. Even though the lines and style are so beautiful, the wood was in really bad shape. It looked like it had sat on someone’s porch in the elements for a while. The top was in the worst condition and was badly water damaged. In this post, I’ll show you how to fix a dresser with wood veneer that is too far gone.
Removing Ruined Veneer
Just in case you’re not familiar with what wood veneer is, it’s very-very thinly sliced real wood that’s either glued to a core of less expensive material (ie: plywood, MDF, particle board) or can be backed with adhesive and paper like a sticker that you can apply to a surface yourself.
I think the term “veneer” sometimes get a bad rap, and I often hear people use “veneer” and “laminate” interchangeably. But know, that wood veneer and laminate are two very different things.
So here’s the reason I deemed this dresser not worth it, the wood veneer was glued to particle board! This was the first time I’d run into this situation. With the furniture I’ve had experience with in the past, the veneer has been glued to solid wood or plywood. In those situations, you can remove the damaged veneer then simply apply a new sheet of veneer to the wood underneath. Or sometimes, you can just paint over the wood underneath the veneer once its removed.
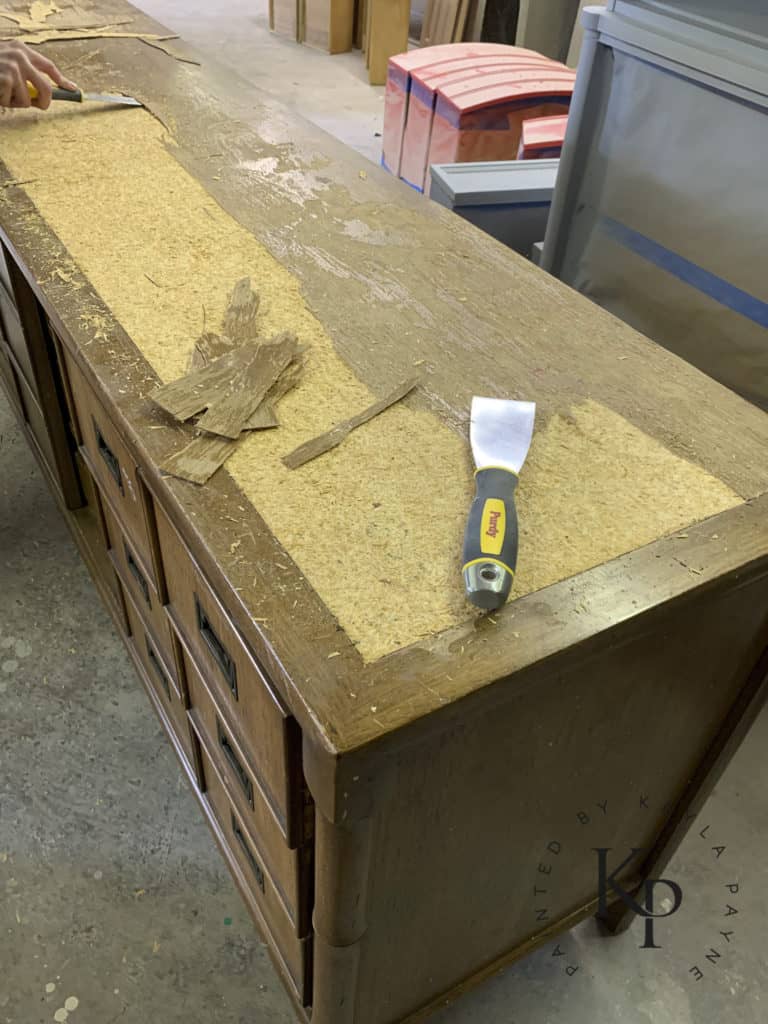
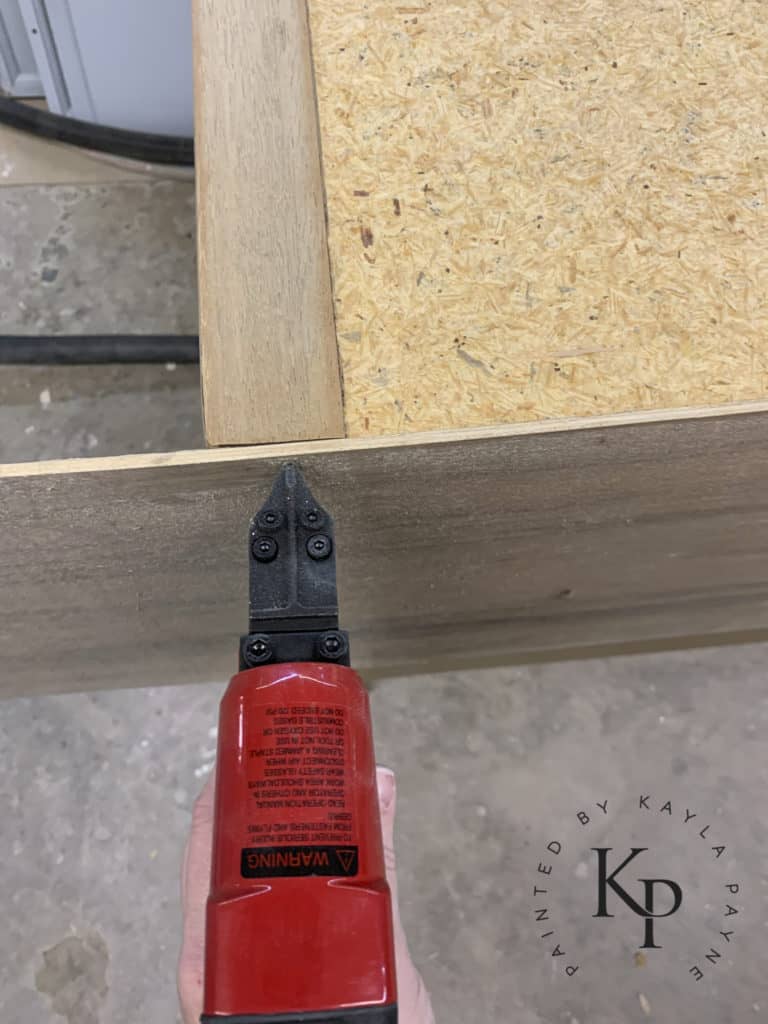
But in this dresser’s situation, the water had penetrated the wood veneer and seeped into the particle board underneath and made it swell. And once particle board gets wet and swells, it doesn’t shrink back. It stays swelled up and essentially ruins it. We were able to peel away the layer of veneer using metal bladed putty knives. As you can see from the photo above, it came off splinter by splinter lol.
Other ways you can remove veneer include:
- Using a heat gun to warm the adhesive then peel it off.
- Laying a damp towel on the surface then using warm/hot iron over the towel then peeling off (PS: you can check out my friend, Denise @ Salvaged Inspirations, for her tips and tricks on how to remove veneer.
- Using a hair dryer and chisel/scraper/putty knife to peel it off.
After The Veneer Is Removed
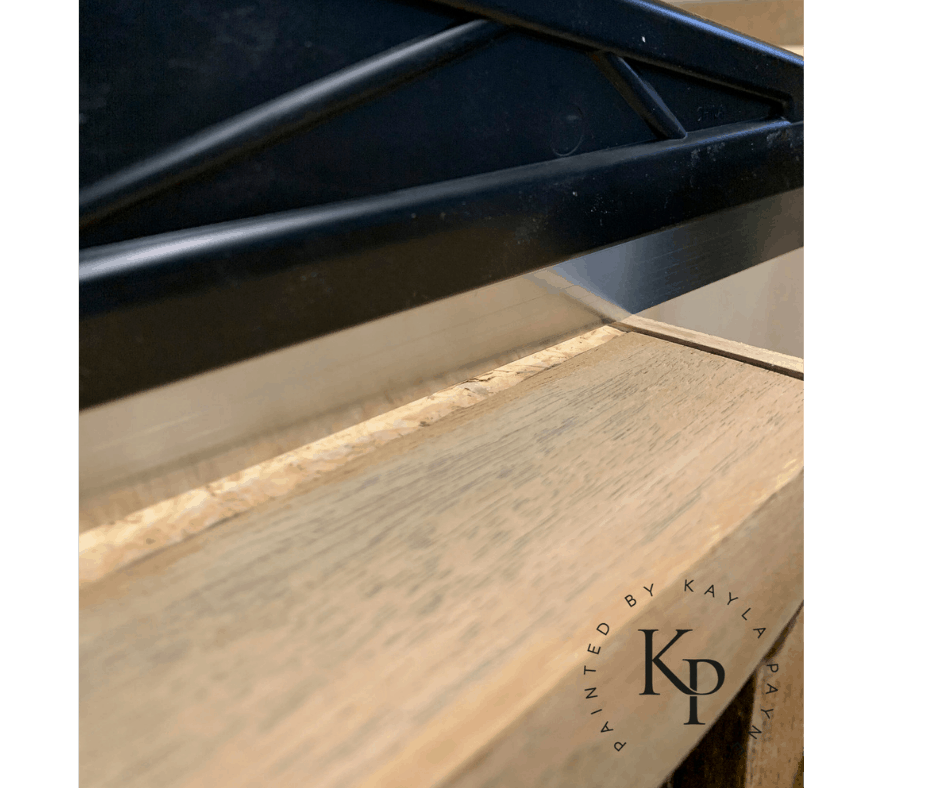
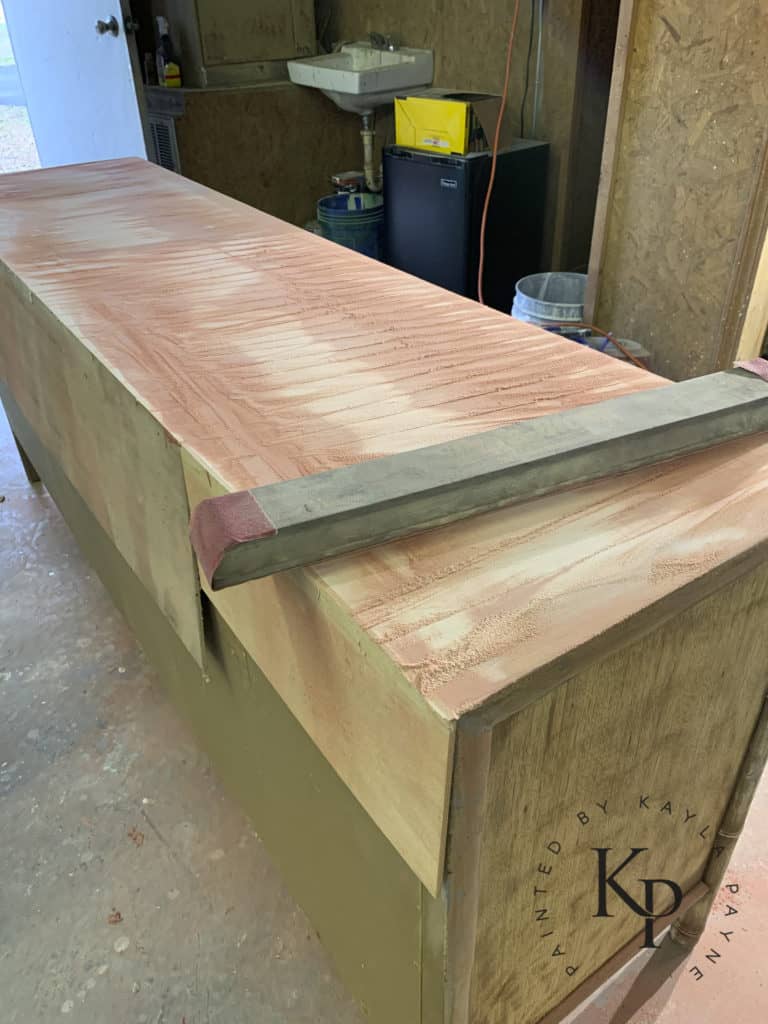
After we had all of the veneer removed, we sanded the heck out of the swelled up particle board. You can see in the photo below that the particle board was surrounded by an edge of solid wood. One of our biggest problems was that the particle board was raised higher than that solid wood edge since it swelled up. It was imperative that we sanded the particle board down far enough that it was lower than the solid wood edging that surrounded it. Our goal was to have a perfectly flat and even surface. Anyone still reading this? Are you asleep yet, lol?

It would’ve been so fantastic if we could have simply applied a new piece of veneer on this sucker then painted over it. But the particle board was so uneven, there was no way to get it to stick properly and be flat enough for our high gloss paint.
Making The Top Flat And Even
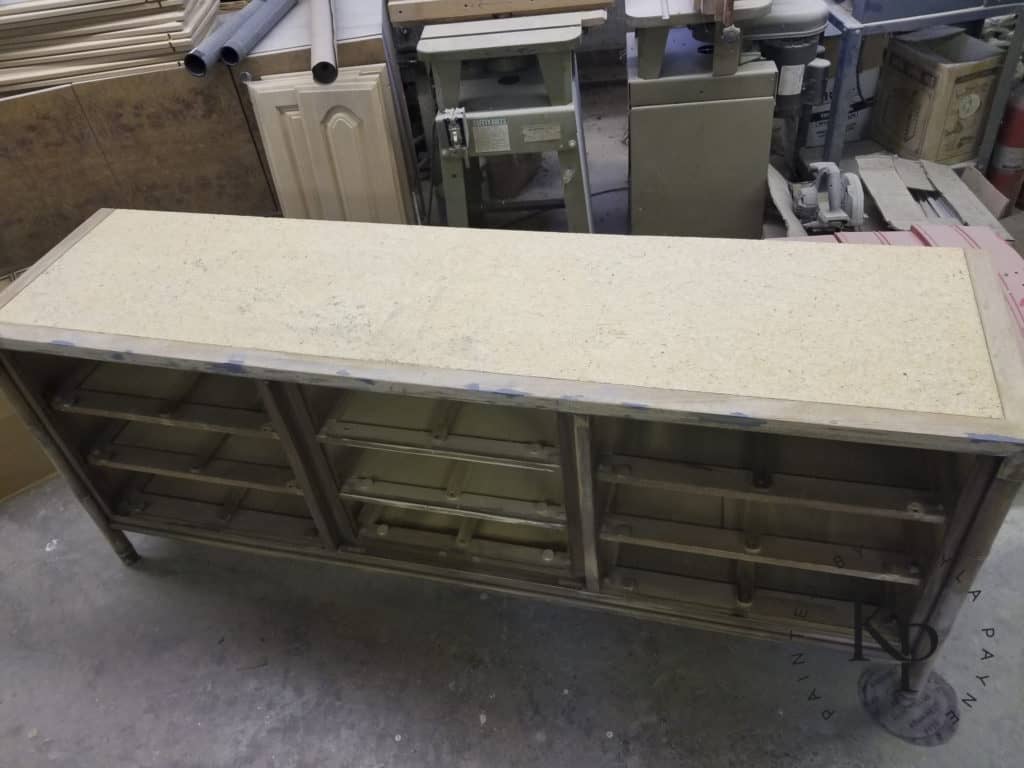
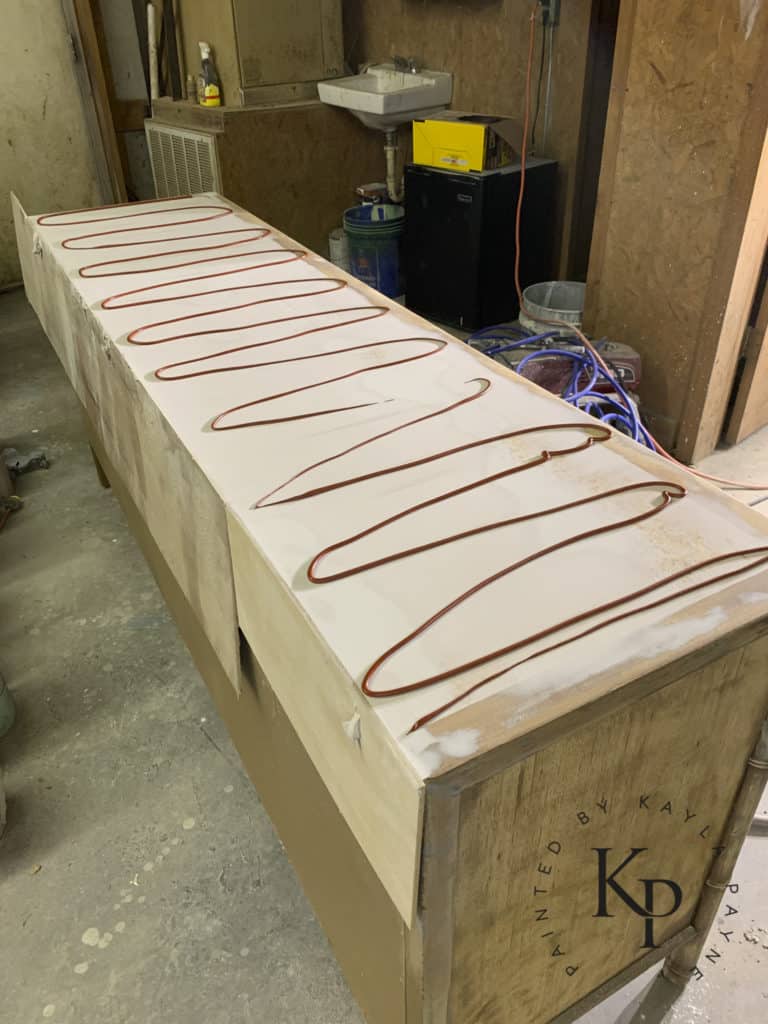
In order to effectively cover the particle board and flatten the surface in preparation for our glossy paint, I applied Bondo to the dresser top. But I had to do it in a very careful and specific way as to not make a total nightmare when it came time to sand it.
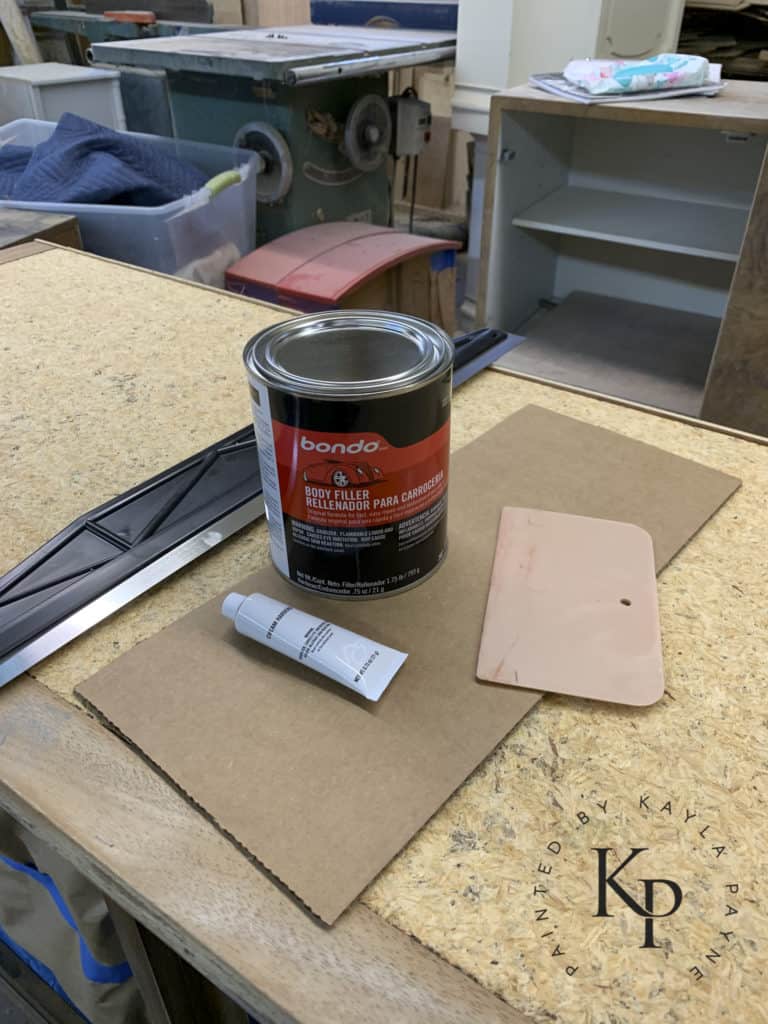
Using Bondo for smaller areas is pretty easy, but when using Bondo on a large surface area can be super tricky. It would be very easy to have major inconsistencies in the thickness of the Bondo you’re applying.
In order for me to apply the Bondo in a somewhat even thickness over the expanse of surface area, I pin nailed a strip of 1/4″ plywood to the backside of the dresser to act as a guide for trowel
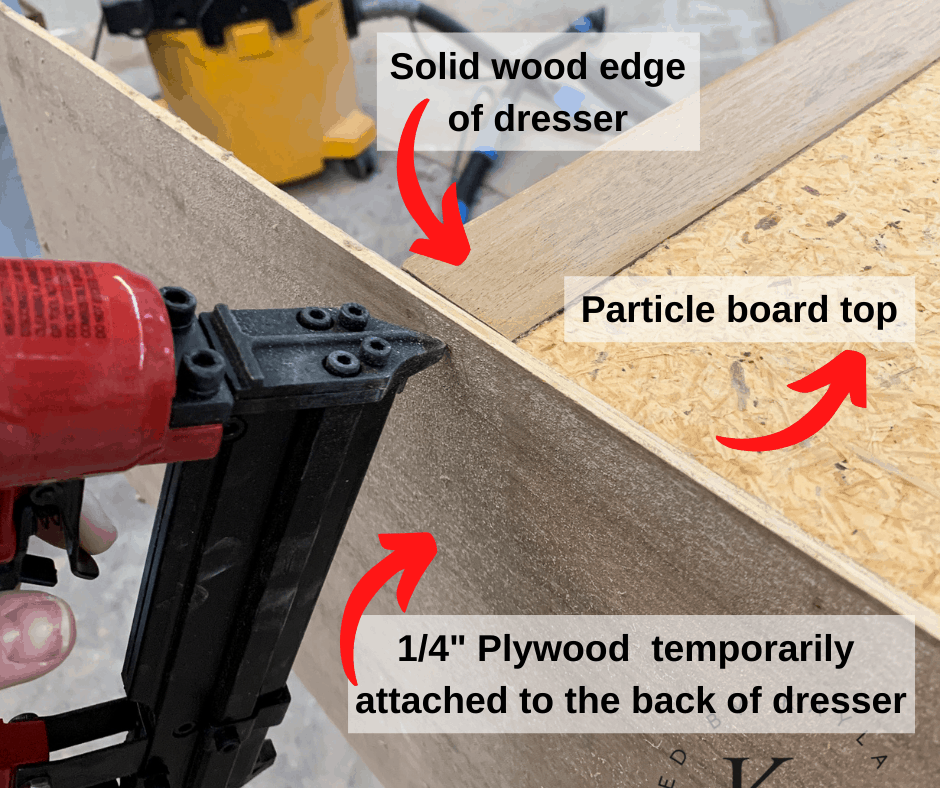
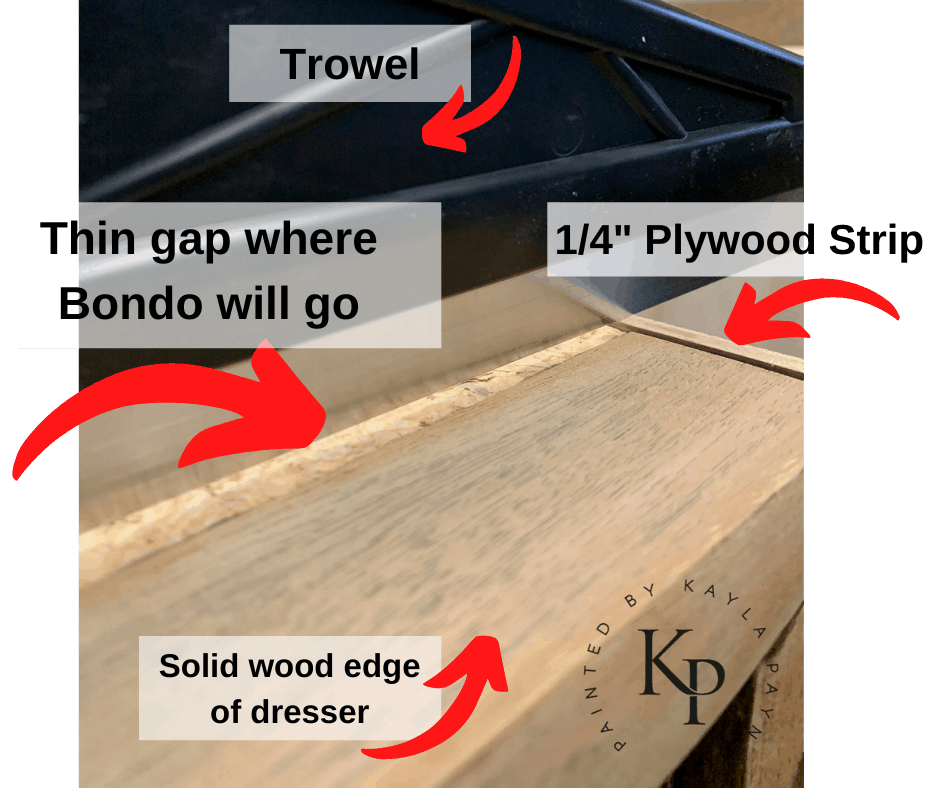
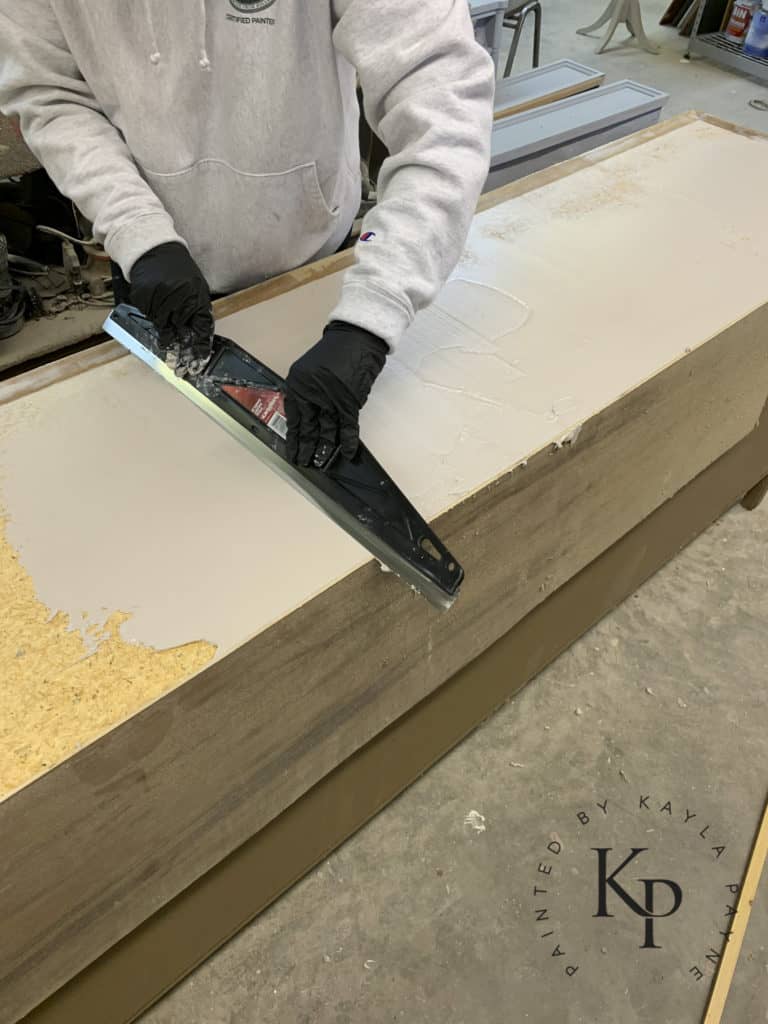
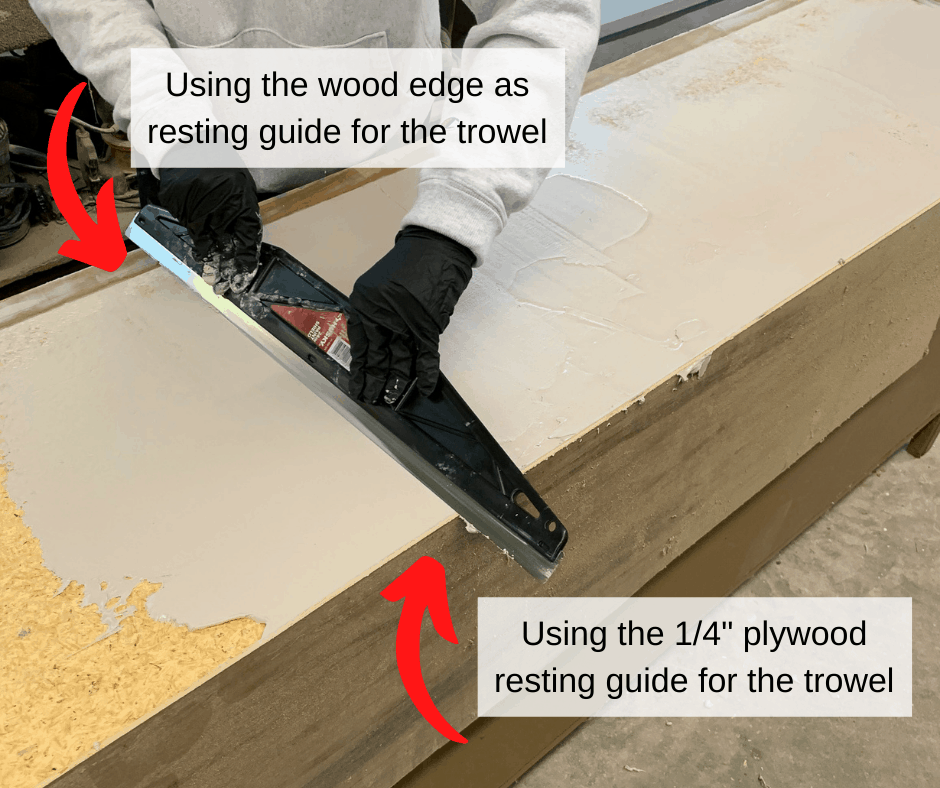
Using a long trowel and the edges as guides allowed me to apply the Bondo as evenly as I could. There’s absolutely no way I could’ve done this by using a smaller putty knife or plastic spreader!
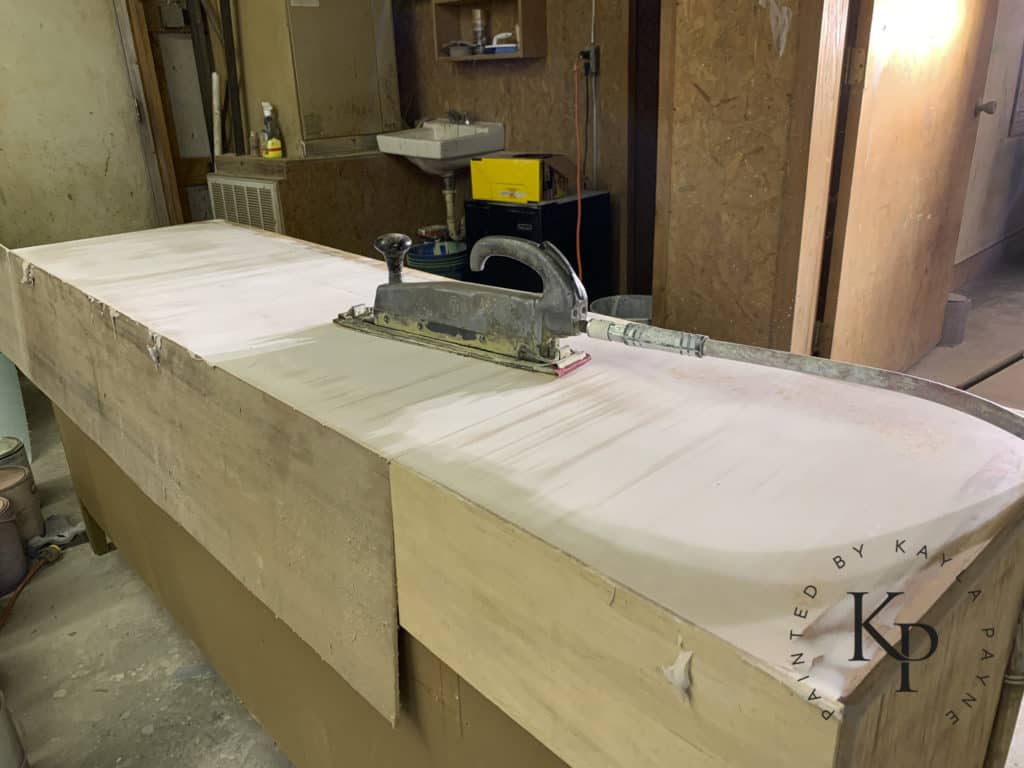
Sanding The Bondo
Sanding Bondo is about as fun as hitting your finger with a hammer, honestly. I used a pneumatic longboard sander (also known as a straight line sander) with sandpaper grits beginning with 40 and working up to 60 then 80. This was just to knock down the ridges and highest points of the Bondo.
I applied Bondo Spot and Glazing putty after the bulk of the ridges were flattened out. This was to help fill in the low spots. The red Spot and Glazing putty is SO much easier to work with that the gray Bondo.
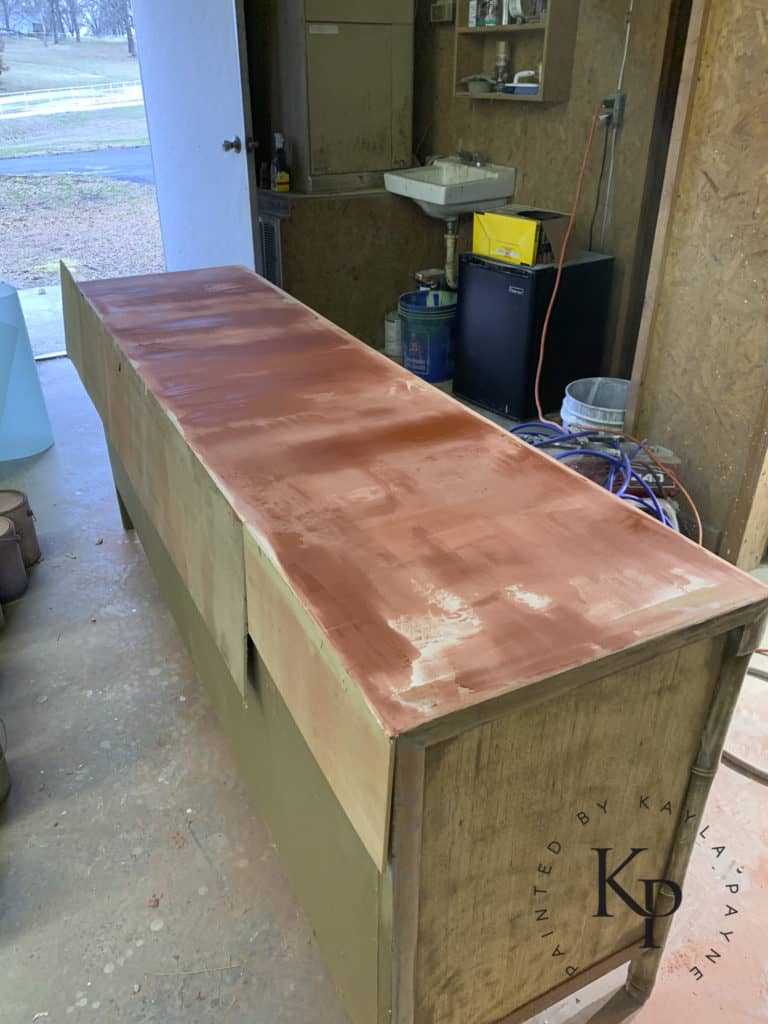
I squeezed a liberal entire tube amount onto the dresser top, then spread it out evenly with the trowel just like I showed before. Then sanded it again.
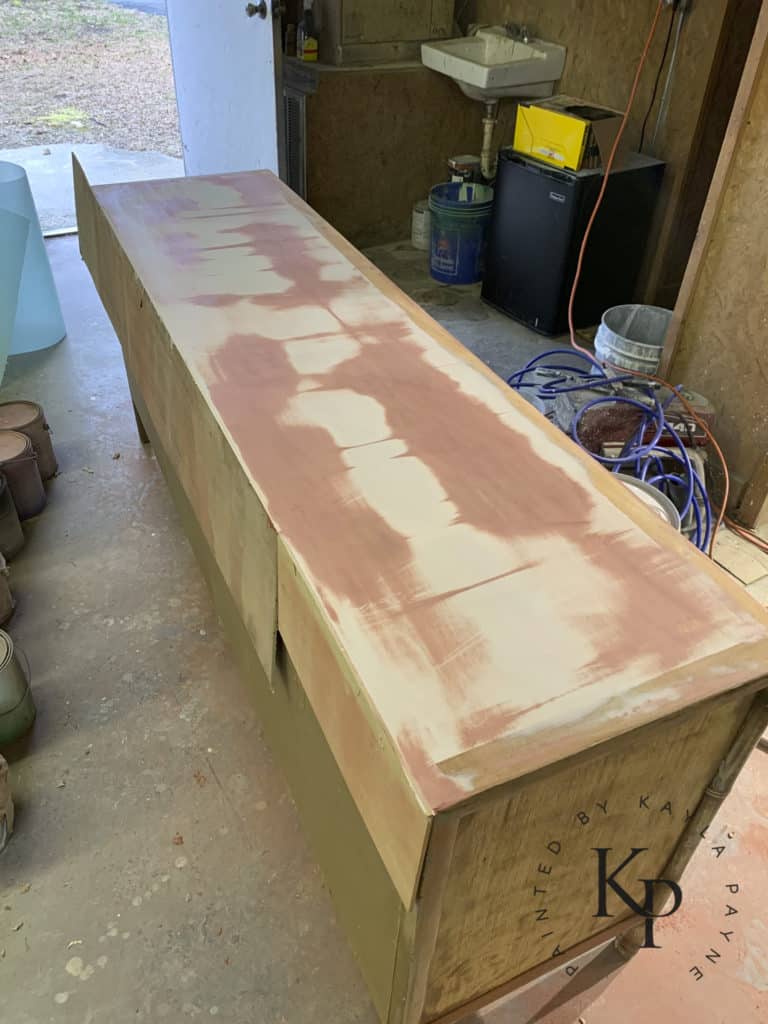
At this point, my dresser top was much better. I won’t say it was dead flat by any means…but it was good enough for me to finally move onto priming!
Priming
It’s at this very moment in writing this post that I realize I have no photos of priming or painting this dresser. Ooops.
For primer, I used Omni MP282 High Build 2K Primer Surfacer (it’s automotive primer, more details can be found in this post)
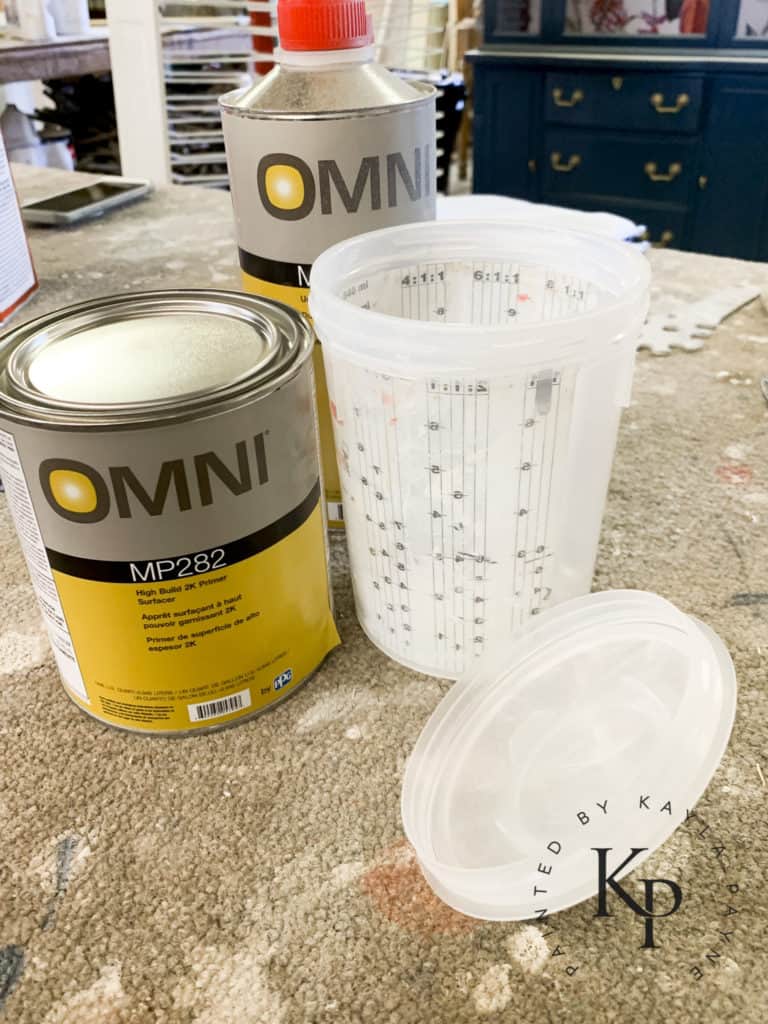
We sprayed three coats of this primer. Then sanded everything beginning with 320 grit and worked our way up to 600 grit.
Painting
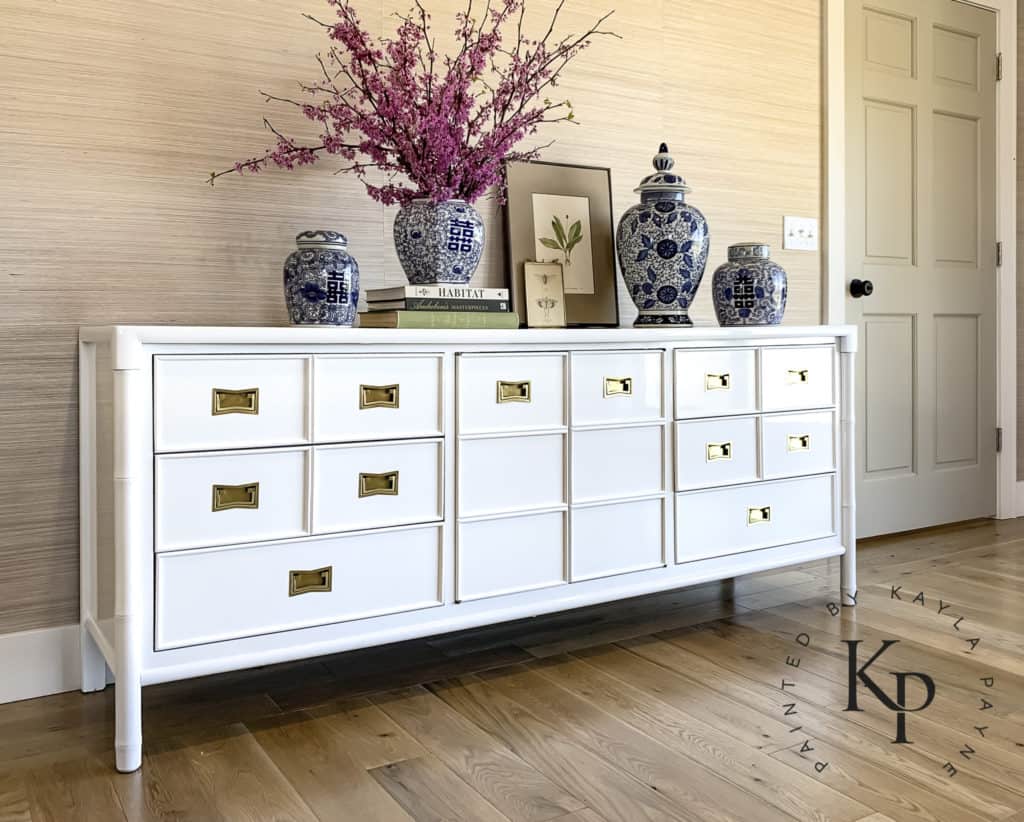
The client who bought this dresser requested a pure, bright white with no gray or yellow undertones. I searched through the color chips at my local automotive paint store to find the best choice. It’s slightly annoying that their colors don’t have names, only a number. I literally have no idea what the color is😬
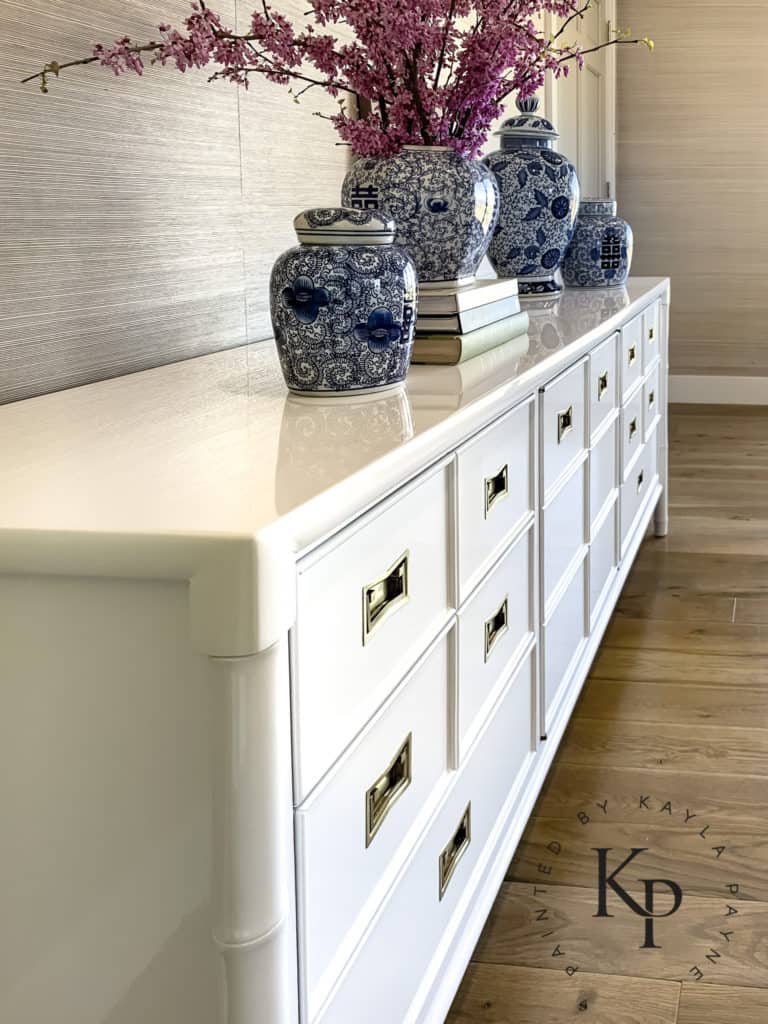
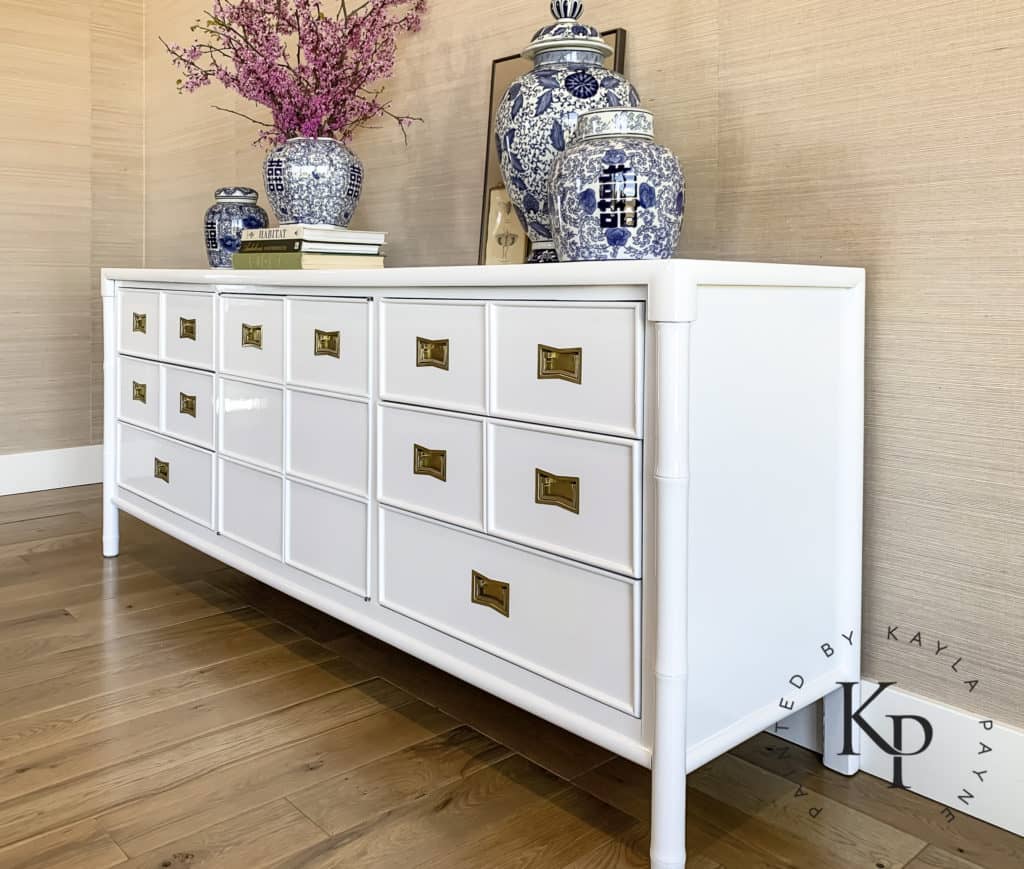
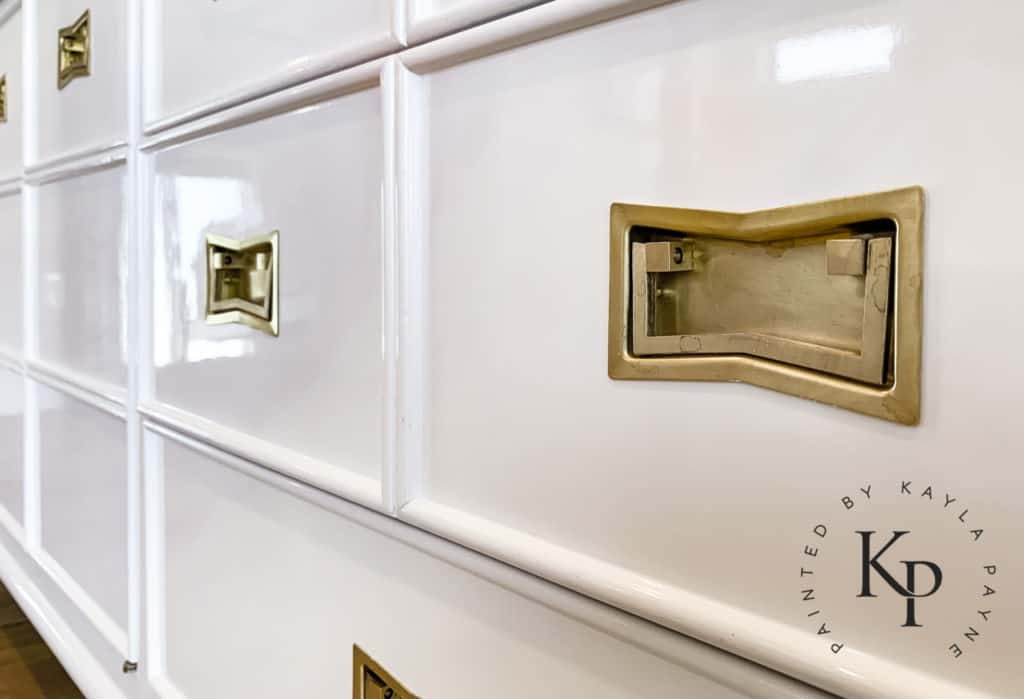
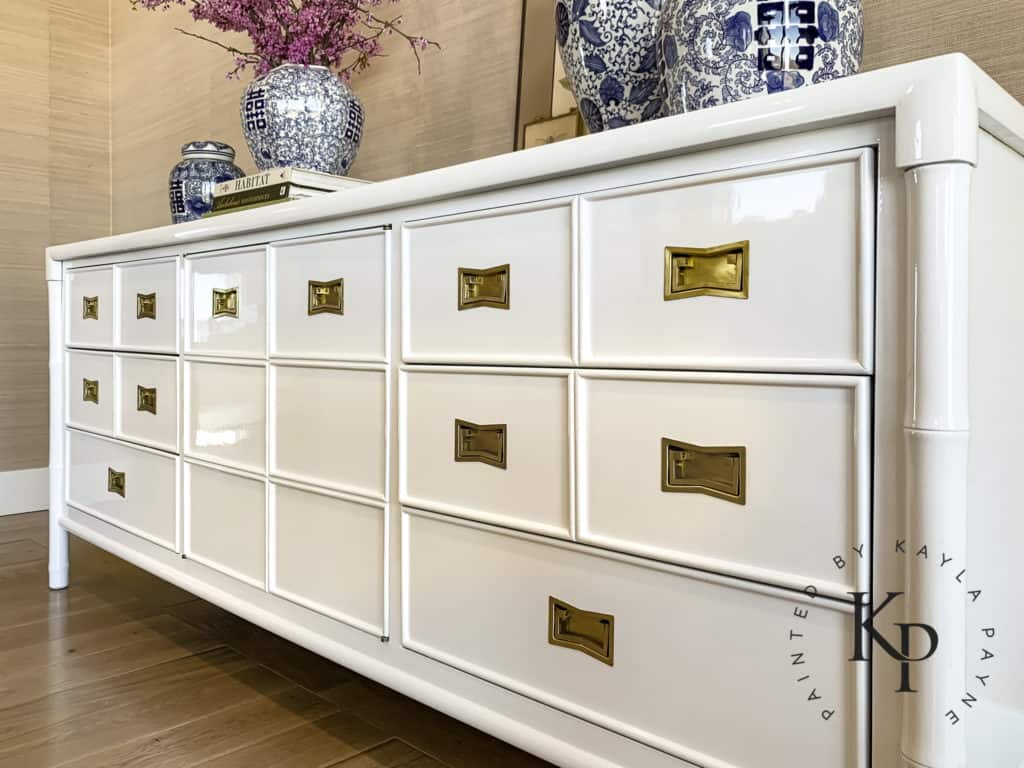
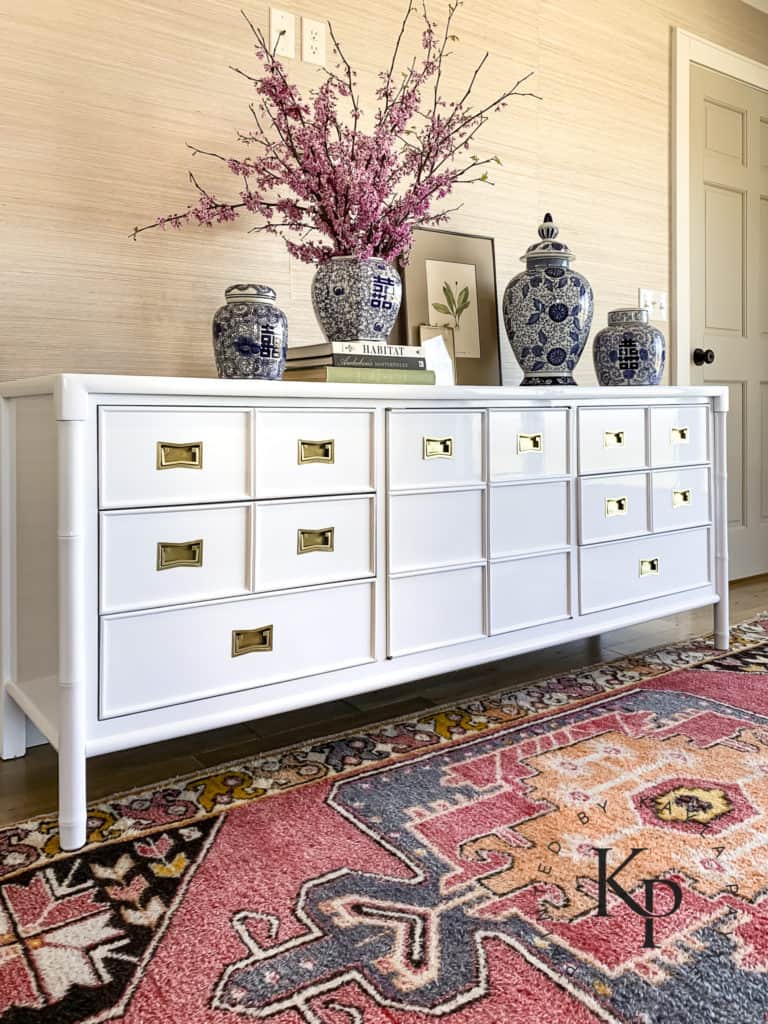
The After
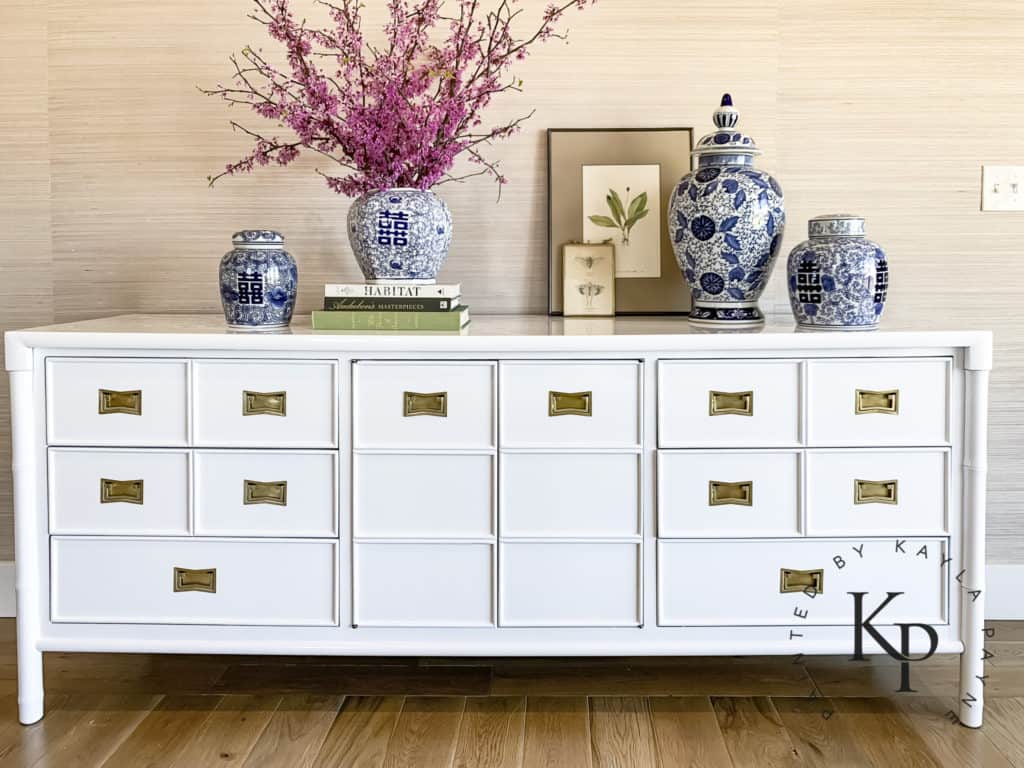
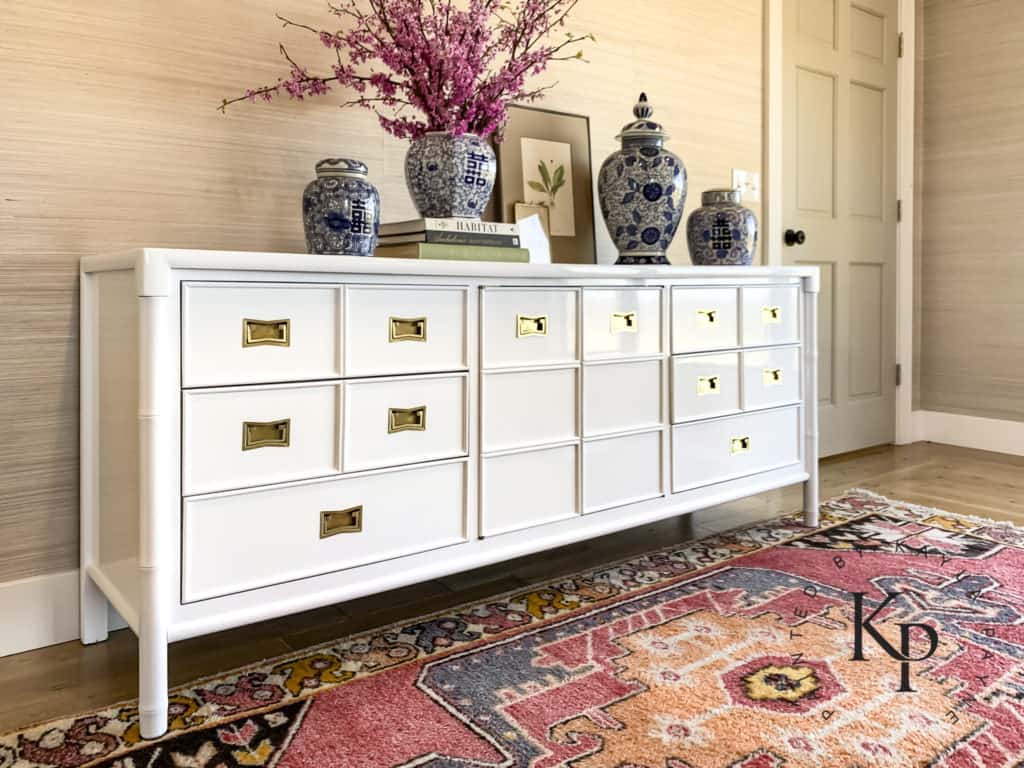
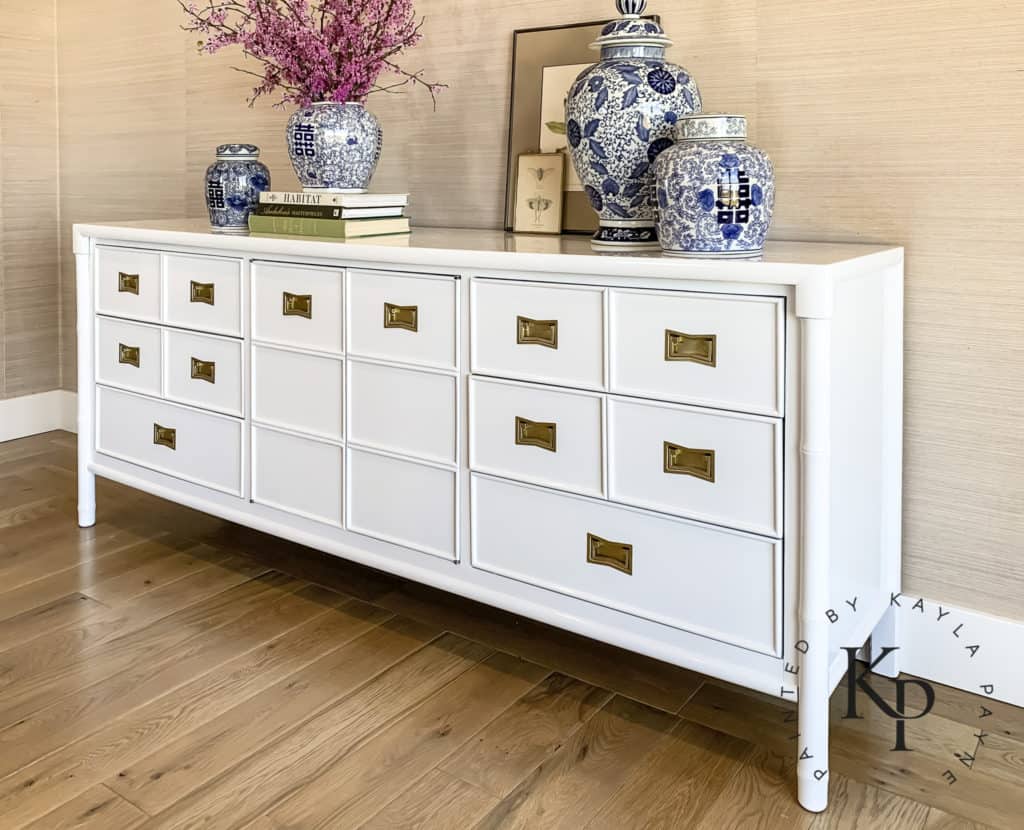
Apparently I couldn’t decide between photos with run versus without rug lol 🤷🏼♀️
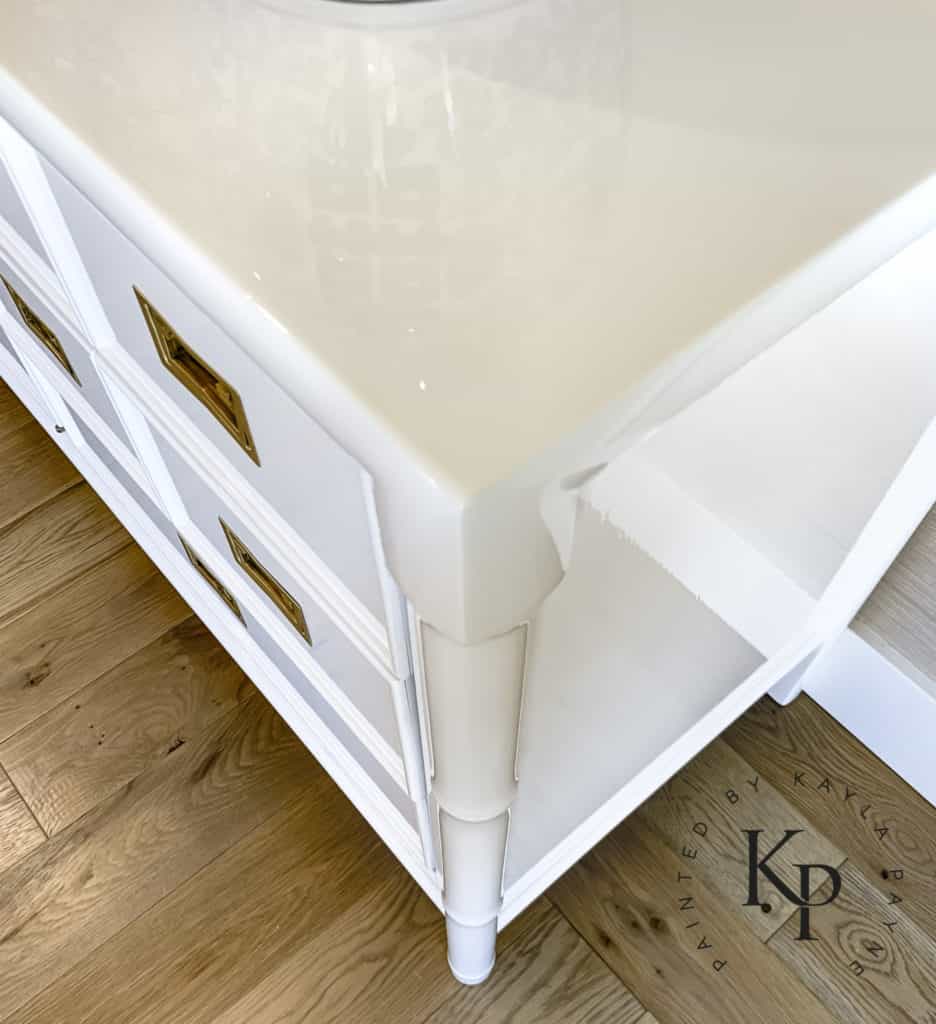
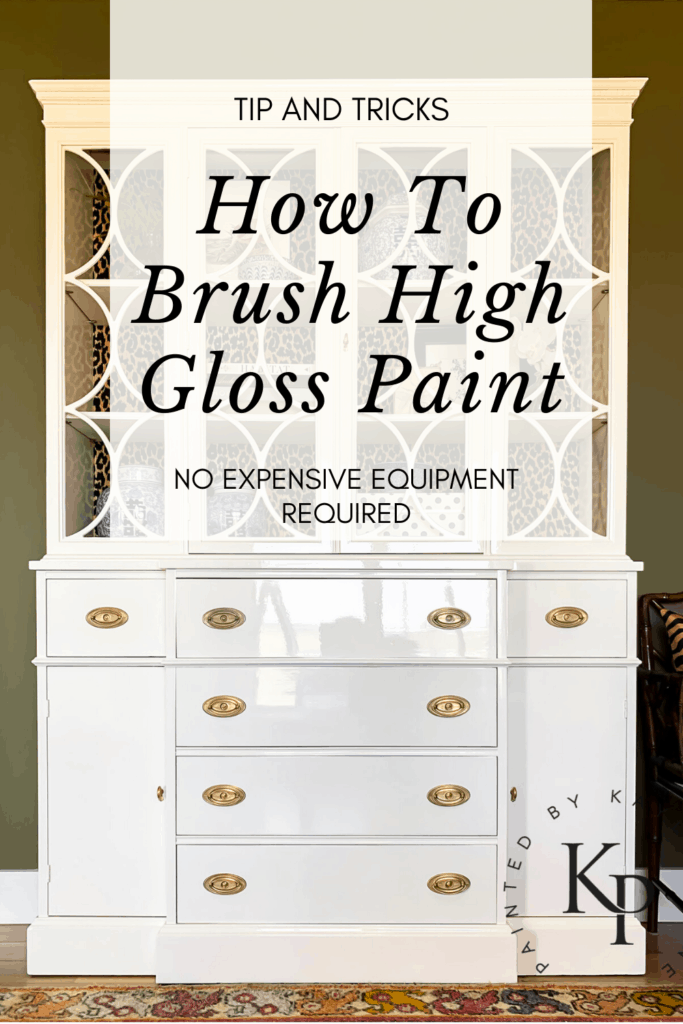
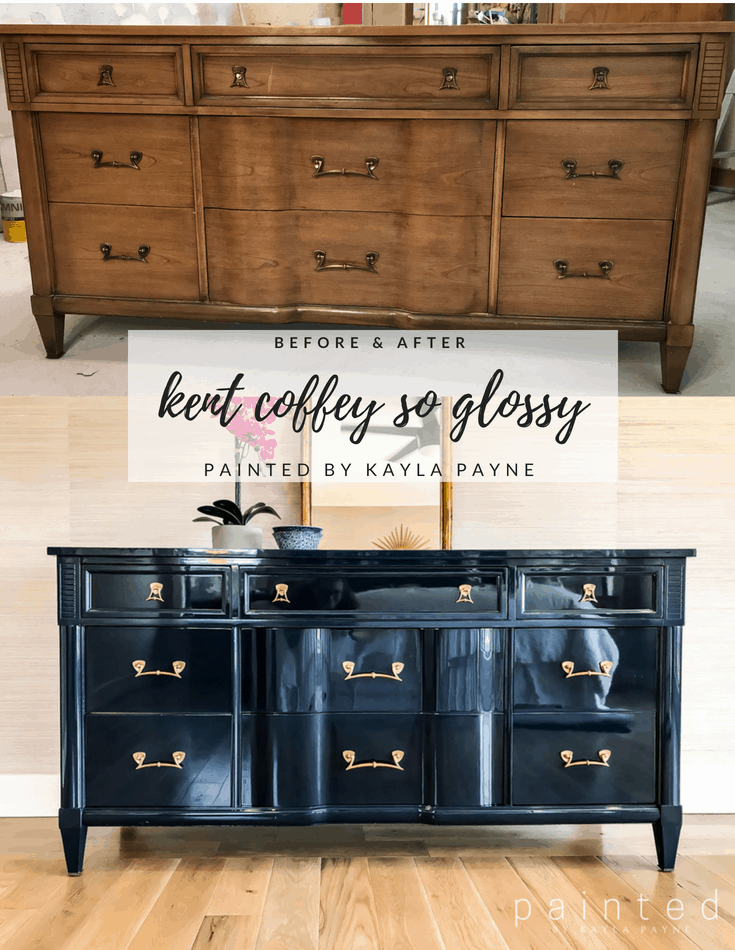
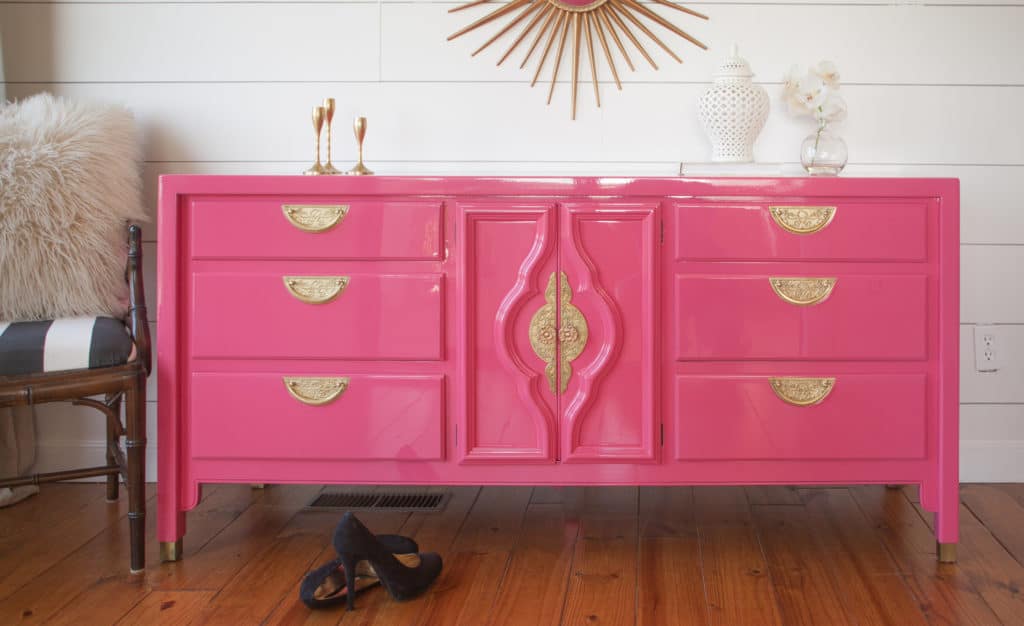
If you love high gloss furniture and want to see more…you’ve come to the right place! Click on the photos below to see more glossy goodness:)
xo Kayla
I admire your tenacity. I don’t think I would have had the patience for the piece. Like you, I’ve never seen particle board under veneer in vintage pieces.
My heart felt for you.
Better luck in oncoming projects.
Thanks Ann! It was a rough go at it for sure lol!! Thanks for your comment, I appreciate you xo
Excellent work. I’m in the same boat and Googled wood veneer over particle board.
Luckily, my desk is not as far gone. Hoping I can figure out how to smooth the edges that exposed the particle board. I am crafty too, but wasn’t expecting THIS kind of trickery lol.
Oh my, so much work but such ingenious solutions! I marvel at your busting out those specialized tools to use on this nightmarish project. Not exactly your usual protocols here. Just wondering though, about who the “we” is. Did you have to hire a consultant on this one, or do you have a support team? Stellar results on the finished project! Thanks for sharing this one.
so beautiful when finished………..you truly know how to make something out of nothing…I’m guessing I would have tossed it the burn pile 🙂
The olive green kitchen cabinets are georgous! I paint cabinets myself as a business and I love when clients take a chance at something other than grey or white. Your work is impeccable, it inspires me!!!
All I can say is gorgeous! Your pieces are inspiring! Love them all!
L
I just ran into the SAME situation! (except my particle board isn’t buckled) Fortunately, it was a piece that I scored for free but when I scraped off the damaged veneer, I was pretty freaked out that I may have just ruined the whole piece when I discovered there wasn’t real wood underneath. I’m still debating how to solve this problem but right now it looks like I’ll either be learning how to work with a new layer of veneer or finding a VERY thin piece of wood to attach to the top. I’m all about learning new skills but I’m not too confident I can make the veneer look good. (I REALLY want the top of the piece to have a natural wood look and paint the rest). Any suggestions? Is veneer hard to perfect?
You can attach a new piece of veneer for sure, i’ve never done it myself, but it isn’t difficult. the only thing is, your substrate does need to be perfectly flat and smooth. as long as its flat and smooth, youre good to go! there are some beautiful veneers out there, go wild!! xo
Wow Kayla! At first glance I couldn’t imagine the end results. You really have a special touch for turning a disaster into amazing. It’s stunning. Thanks for sharing this one.